


Table of contents
- What Is Portainer?
- Prerequisites
- Install Portainer With Docker In Linux
- Manage Docker Containers Using Portainer
- Creating Containers
- Manage Containers
- View Container Logs
- Inspect Container
- Access Container Console
- View Container Details
- Docker Images
- Networks
- Volumes
- Events
- Host Overview
- Users
- Environments
- Authentication Logs
- Settings
- Conclusion
What Is Portainer?
Portainer is a lightweight, cross-platform, and open source management UI for Docker, Swarm, Kubernetes, and ACI environments.
Portainer allows you to manage containers, images, networks and volumes via simple web-based dashboard and/or an extensive API.
Using Portainer, we can easily deploy, configure and secure containers in minutes on Docker, Kubernetes, Swarm and Nomad in any cloud, datacenter or device.
It was originally the fork of Docker UI. The developer has rewritten pretty much all of the Docker UI original code. He also has revamped the UX completely and added some more functionality in the recent versions.
Portainer is available in two editions: Portainer Community Edition(CE) and Portainer Business Edition(BE).
The Portainer CE is free for personal use that includes a few essential features for container management. And the Portainer BE is paid version that includes complete features and professional support.
Portainer supports GNU/Linux, Microsoft Windows, and macOS.
Prerequisites
For the purpose of this guide, we will be using Portainer CE, which is free.
- Make sure you have installed Docker and it is working. Portainer has full support for Docker version 1.10 and higher versions.
To install Docker in Linux, refer the following links.
- Install Docker Engine And Docker Compose In AlmaLinux, CentOS, Rocky Linux
How to Install Docker Engine And Docker Compose In Ubuntu
Make sure you have sudo or root access to deploy Portainer community edition using Docker.
Open or allow Ports 9443, 9000 and 8000 in your router or firewall if you want to access the portainer web UI from a remote system.
Install Portainer With Docker In Linux
Portainer CE installation is pretty easy and it will take only a few minutes.
First of all, create a volume for Portainer server to store its database.
$ sudo docker volume create portainer_data
Next, run the following command to pull the latest Portainer image and start the Portainer:
$ docker run -d -p 8000:8000 -p 9443:9443 --name portainer --restart=always -v /var/run/docker.sock:/var/run/docker.sock -v portainer_data:/data portainer/portainer-ce:latest
Sample output:
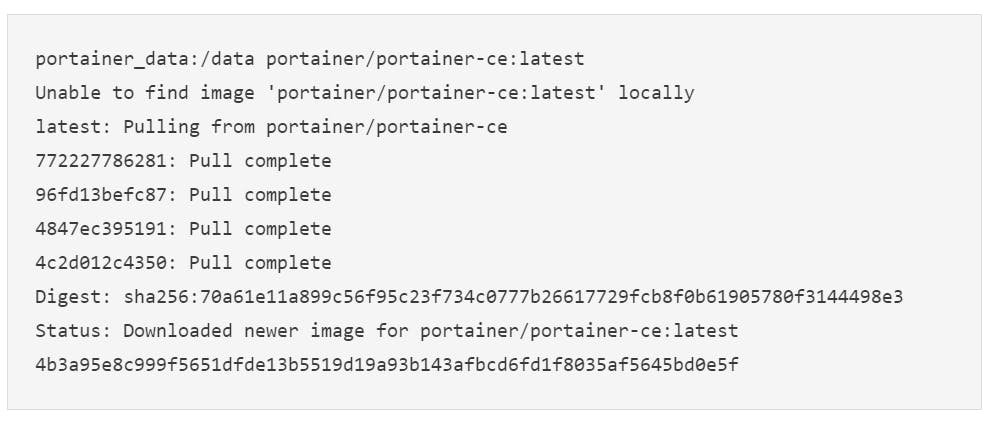
By default, Portainer generates and uses a self-signed SSL certificate to secure port 9443. If you require HTTP port 9000 open for legacy reasons, add -p 9000:9000 to your docker run command:
$ sudo docker run -d -p 8000:8000 -p 9000:9000 --name portainer --restart=always -v /var/run/docker.sock:/var/run/docker.sock -v portainer_data:/data portainer/portainer-ce:latest
Let us check whether the Portainer image has been pulled or not.
$ sudo docker images
Sample output:

We have now installed Portainer in our local Ubuntu system. Let us start the container using command:
Now, Portainer is running! Let us go ahead and access the Portainer UI.
Manage Docker Containers Using Portainer
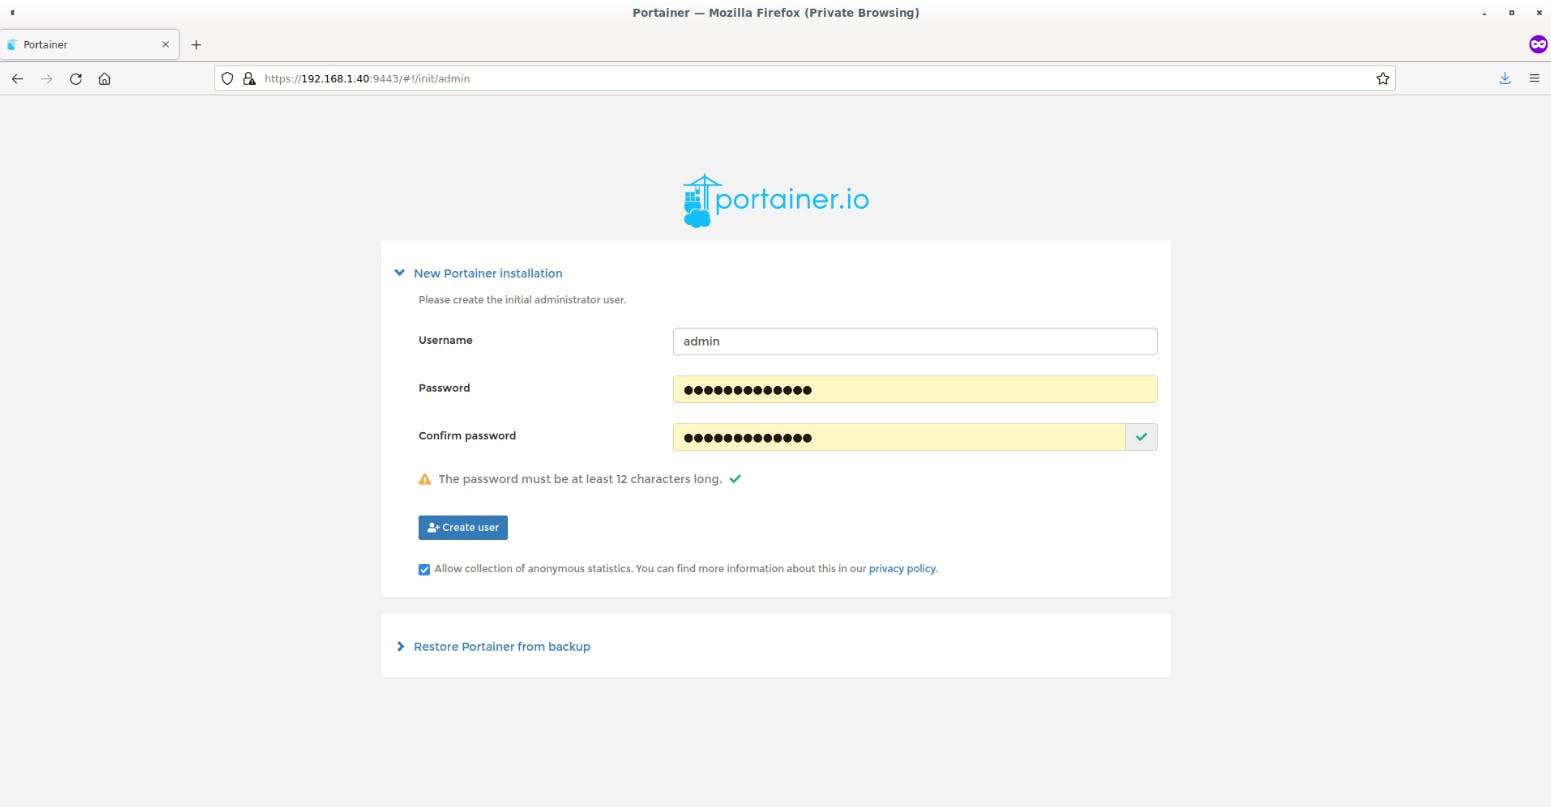
Open your web browser and point it to any one of the following URLs depending upon the port number you used when starting Portainer.
- Portainer https URL (with self-signed certificate) - localhost:9443 or IP_Address:9443.
- Portainer http URL - localhost:9000 or IP_Address:9000.
You will be presented with a screen like below where you should set a strong password for the Portainer admin user. Enter a strong password with minimum 12 characters and click Create user button.
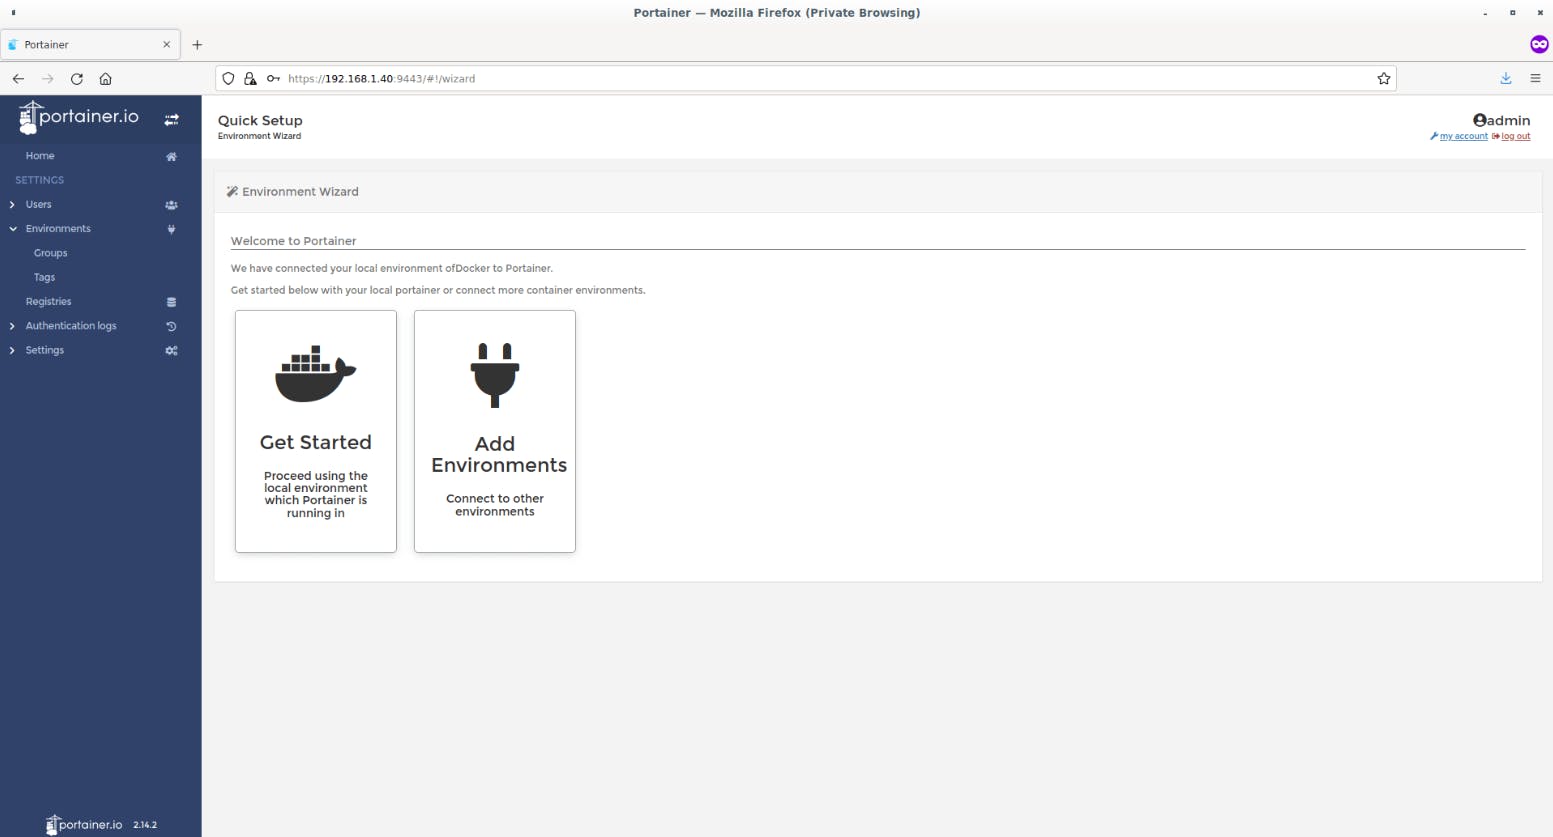
Choose whether you want to proceed using the local environment which Portainier is running in or connect to other environments. I don't have any other environments, so I clicked the "Get started.." button to proceed with the local environment.
This is how Portainer admin dashboard looks like. The dashboard home screen displays the list of connected environments. As you see in the below screeenshot, we are connected with the "local" environment.

Click on the local environment to see the running and stopped containers, number of downloaded docker images, number of volumes and networks.
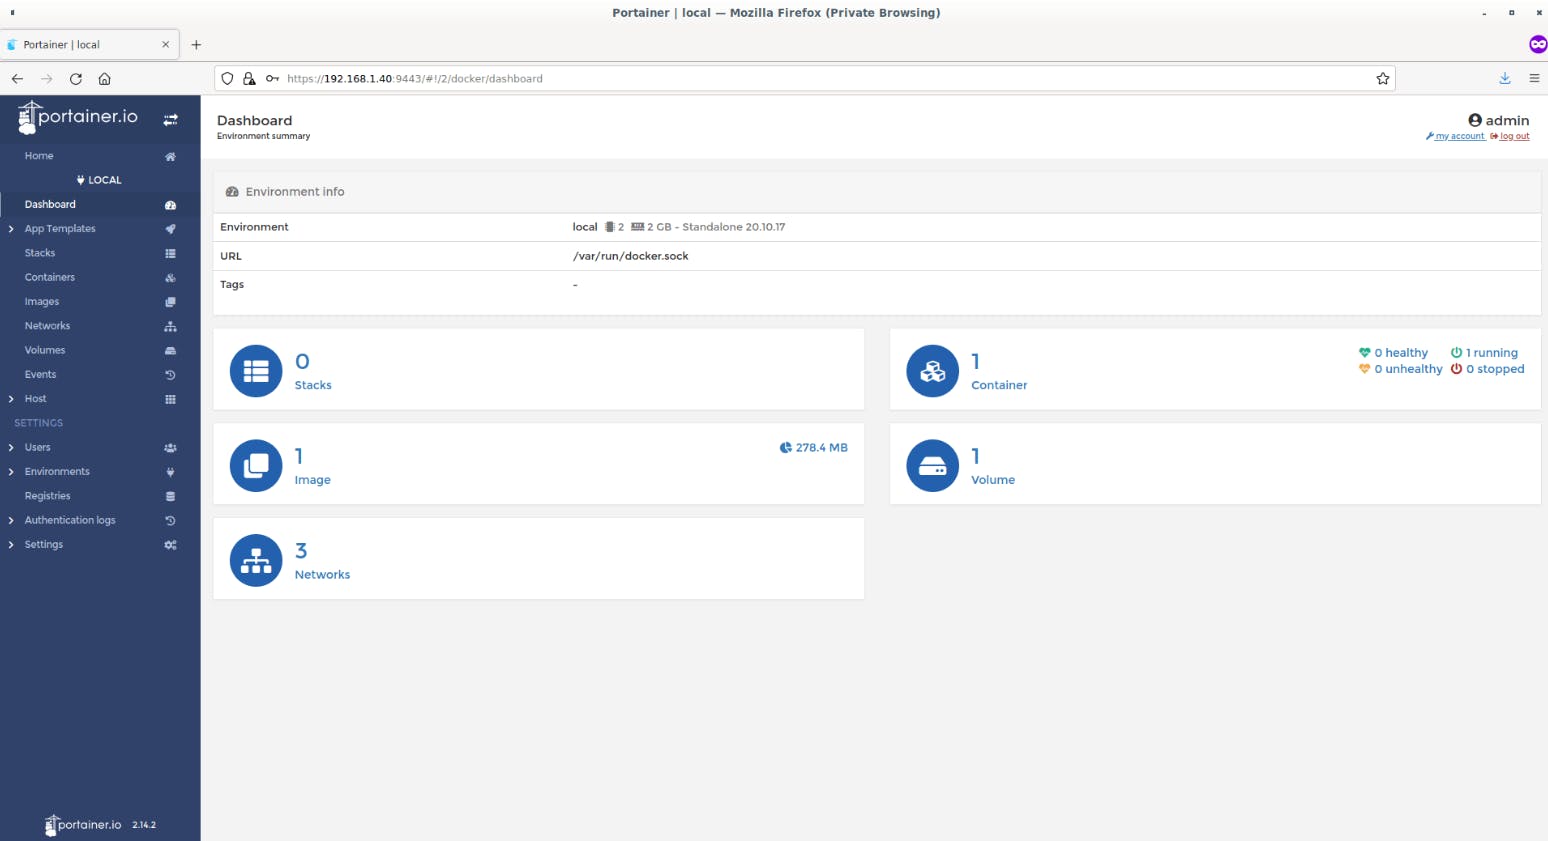
You don't have to memorize docker commands. Everything can be done from the Dashboard itself.
Let us go ahead and create some containers.
Creating Containers
Make sure you're in the Local environment.
Click on the App Templates button on the left side bar. You will see some ready-made templates such as Docker image registry, Nginx, Httpd, MySQl, WordPress and a few more.
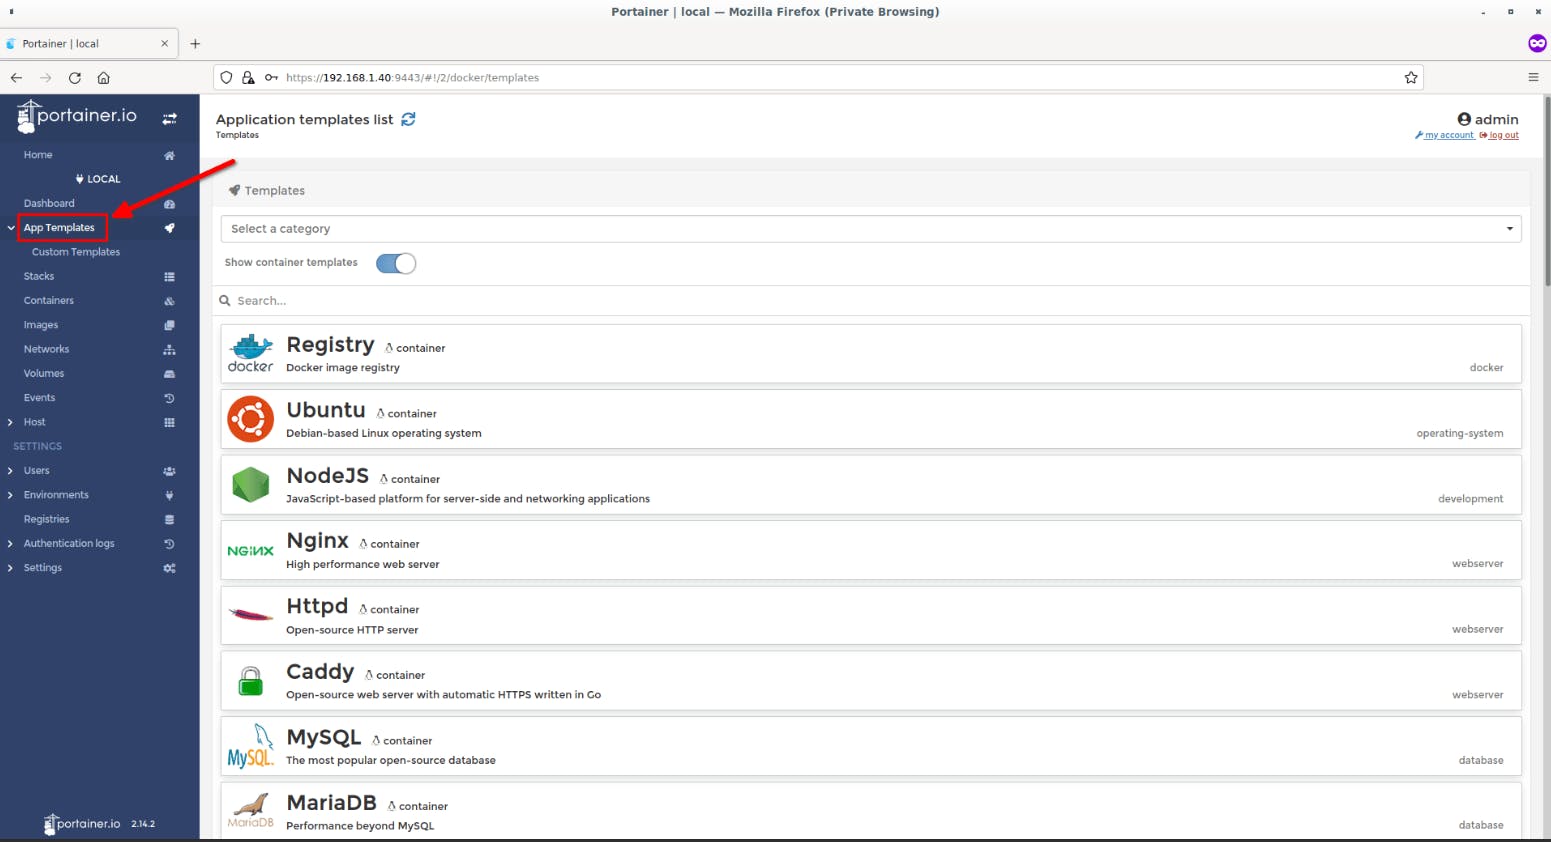
To deploy a Container, just click on the respective template and follow the on-screen instructions.
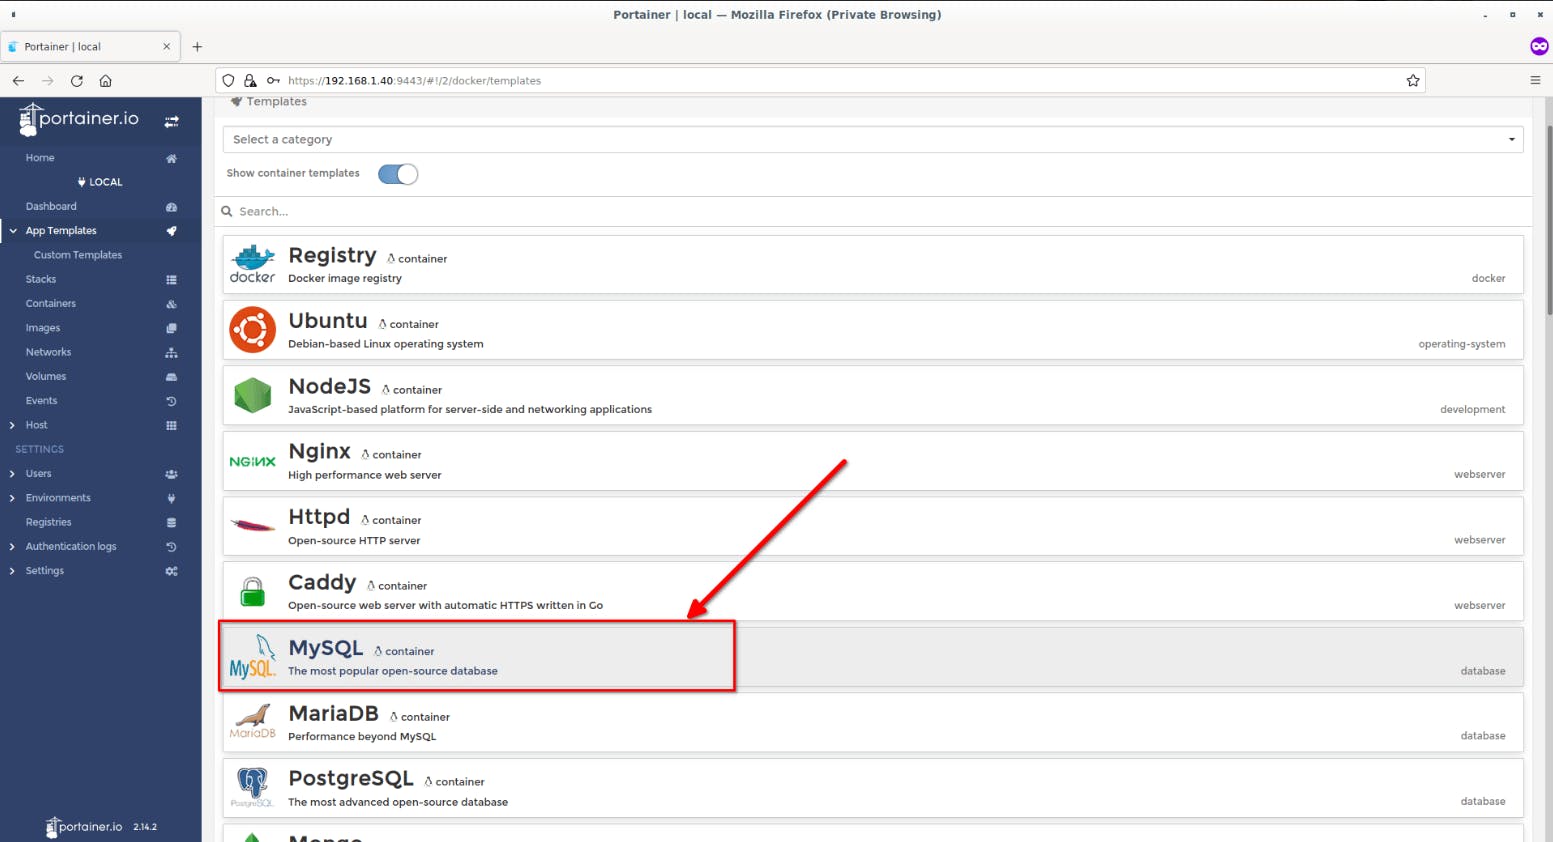
For instance, let us launch MySQL Container. To do so, click on the MySQL template.
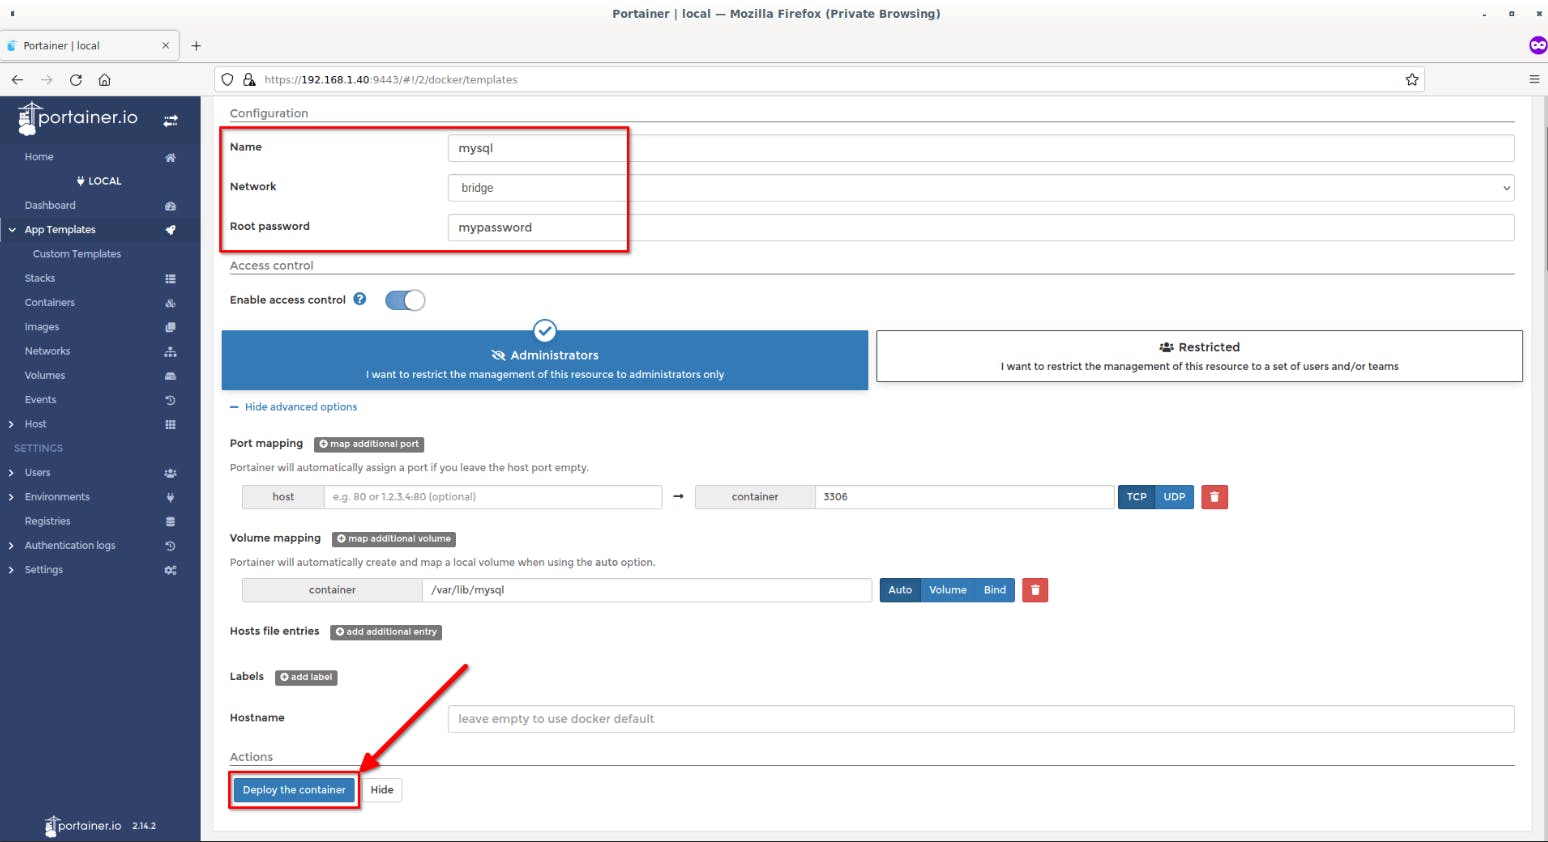
Enter the Container name, select network type (e.g.bride mode), and database root user password. Click on Show advanced options and set port number. If you're not sure what to input, just leave the default values.
Finally, Click Deploy the container button to create the MySQL container.
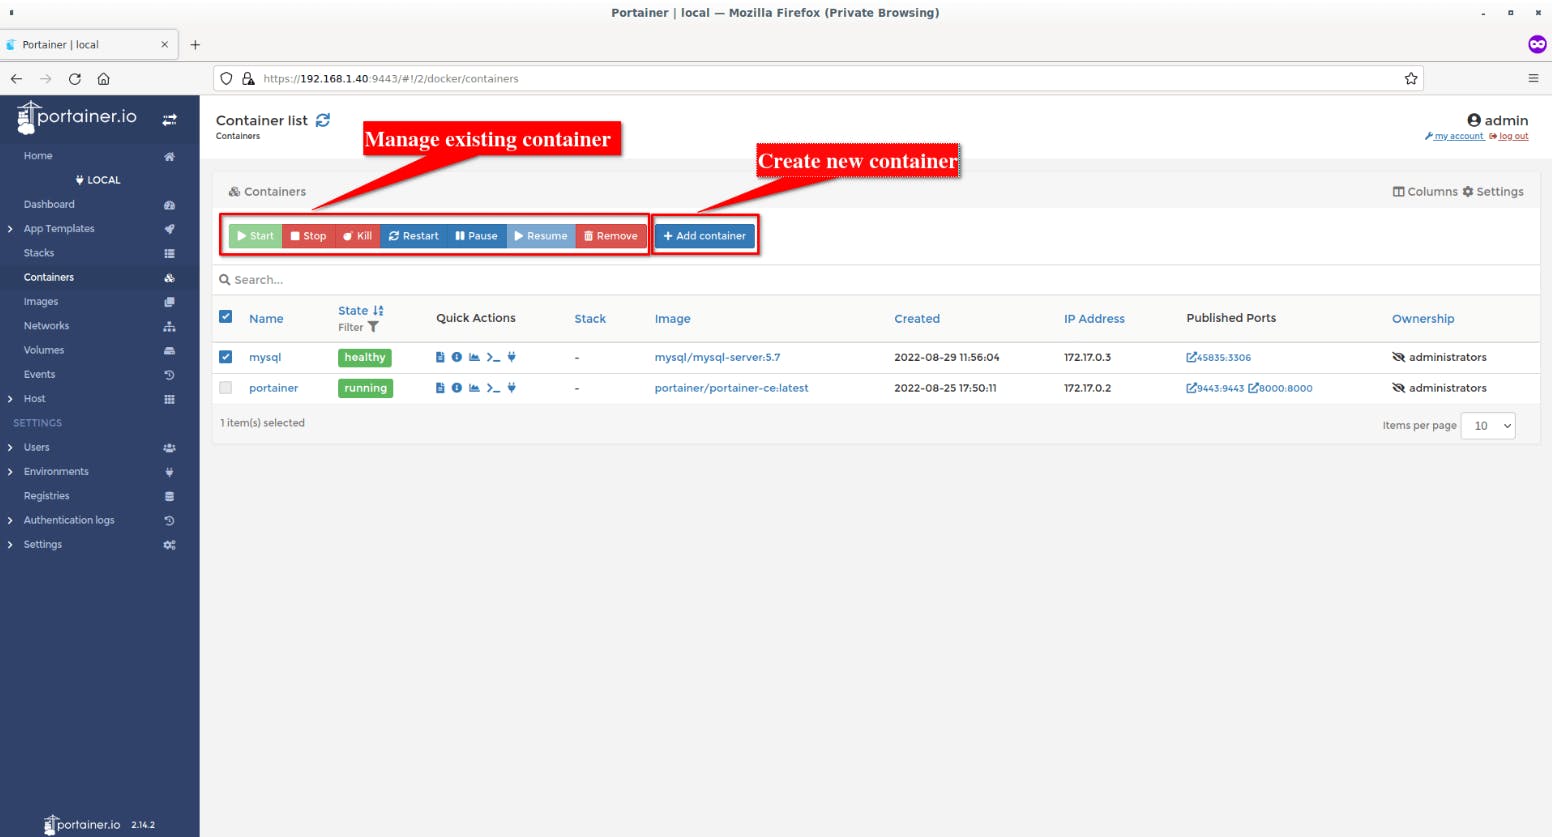
Once the container created, you will be redirected to the Containers page where you can see the list of created and running containers.
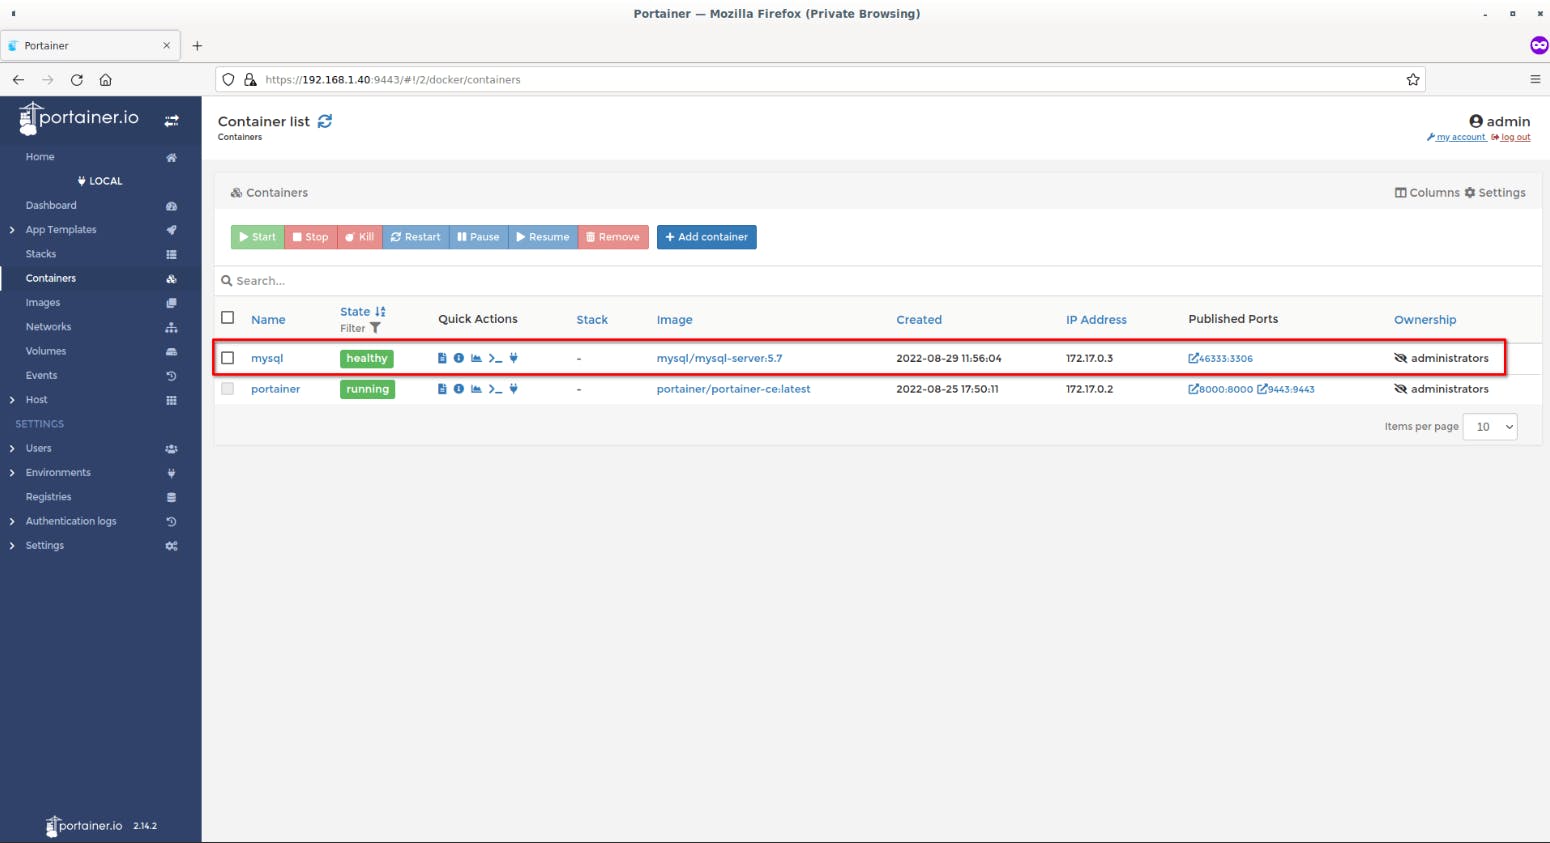
Under the Containers list section, you will see the,
- Name of the running and stopped containers,
- Status of the containers,
- Quick actions buttons,
- Docker image used to create the containers,
- the date and time of container creation,
- IP address of the container,
- Published ports,
- and Ownership details.
To start/stop the newly created container, just select it and hit Start/stop button on the top. You can restart, pause, and remove any Containers from this section.
Manage Containers
We can do all container management operations, such as add new container and start, stop, restart, pause, kill, remove existing containers from under Containers section.
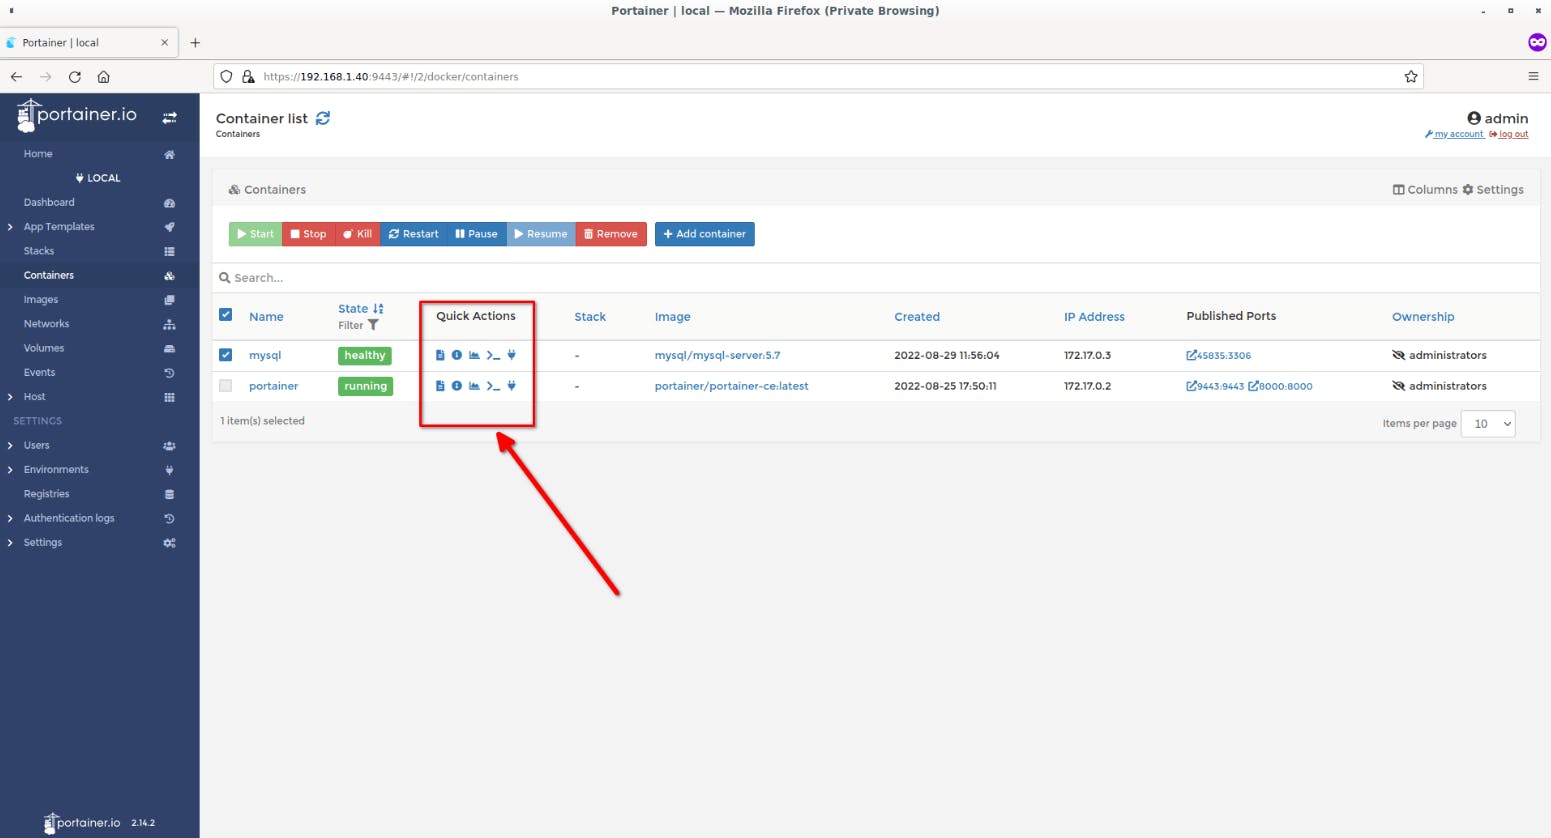
You will see a few "Quick Actions" buttons next to each container. Clicking on a button will perform the respective action.
Under the Quick Actions tab, you will see the following buttons.
- Logs - Display Container logs.
- Inspect - Inspect container image.
- Stats - View Container statistics.
- Console - Access Container console.
- Attach - Attach To Container console.
View Container Logs
Select a Container from the Containers list and then click Logs button under the Quick Actions tab.

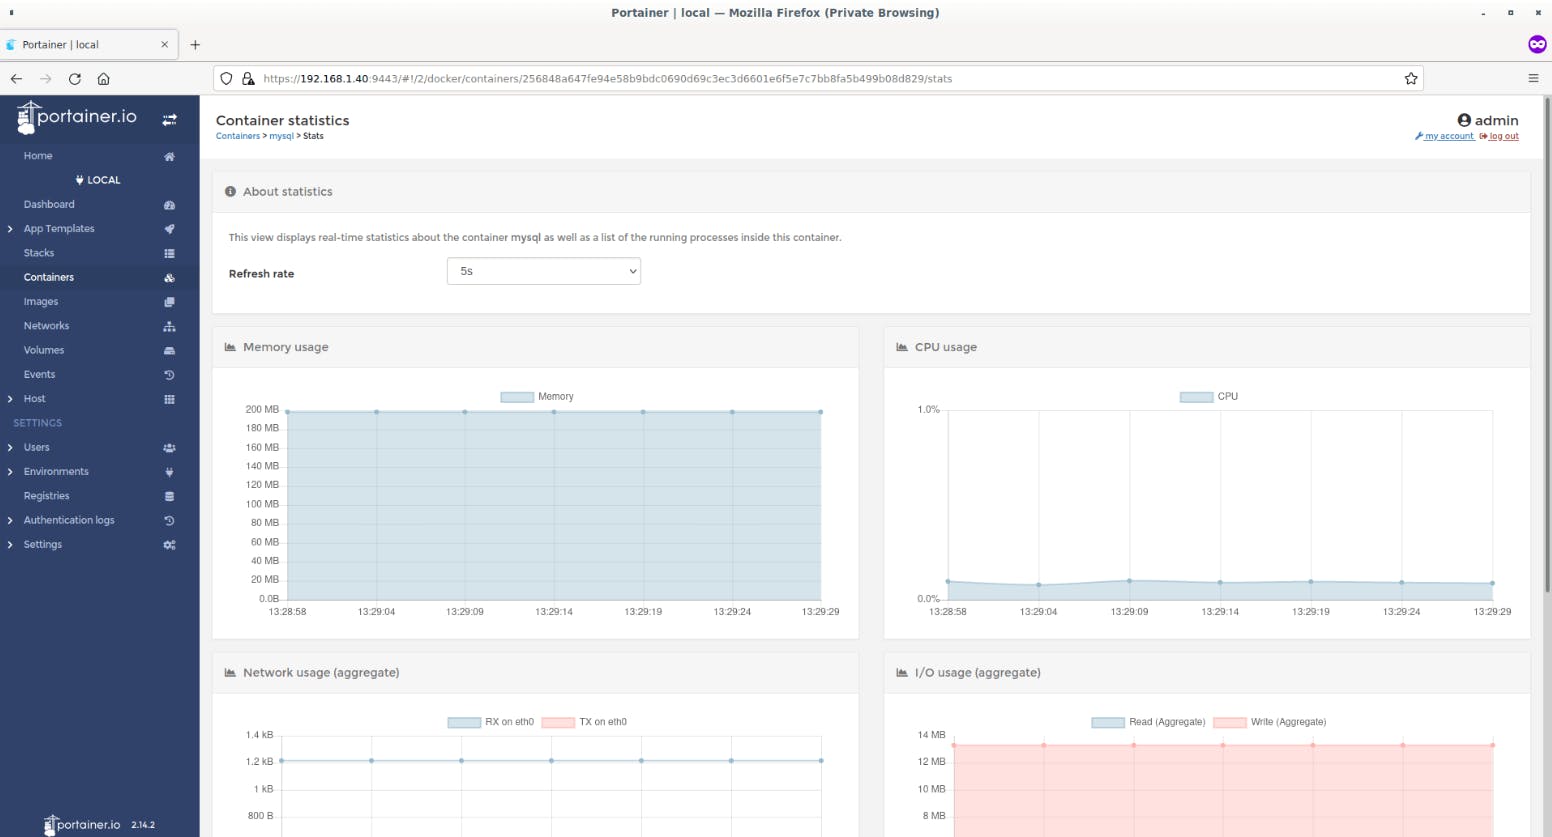
View Container Stats
Click on the Stats button to view what's happening in the newly launched Container.
Access Container Console
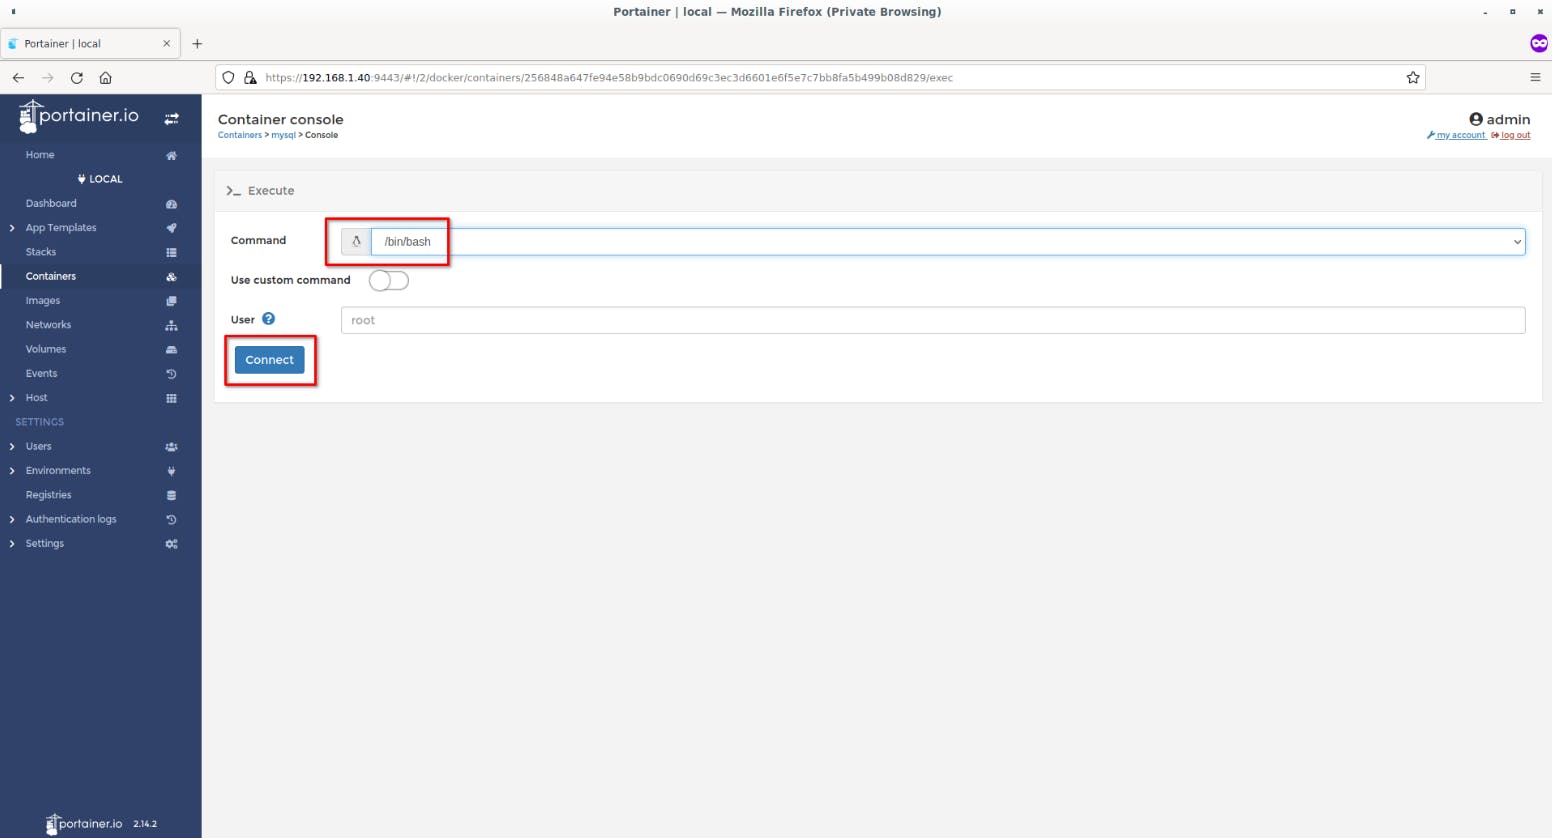
You can easily connect to the console of your Container by clicking on the Console button.
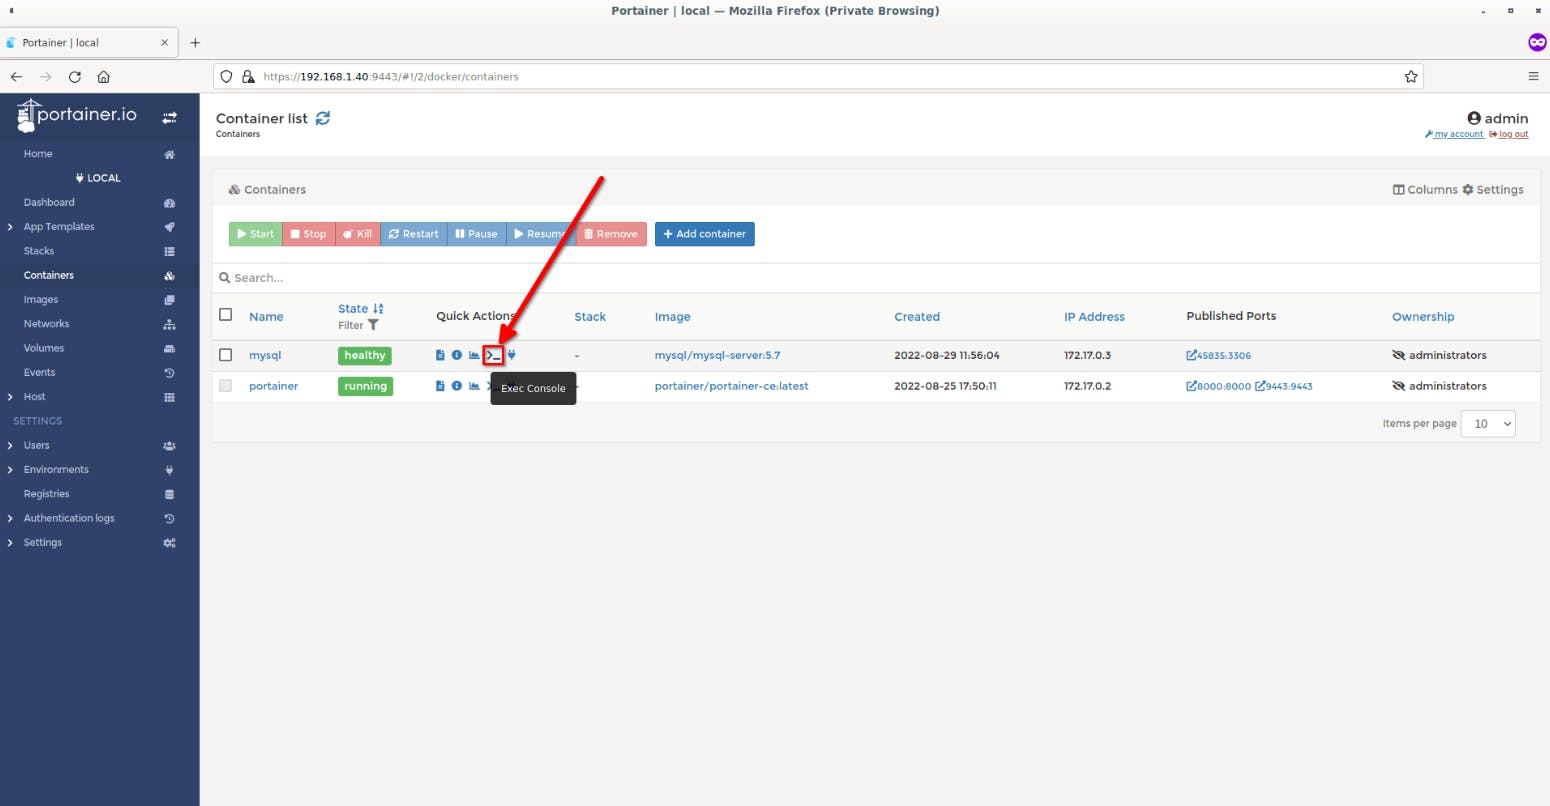
Select the Shell (BASH or SH), and hit Connect button.
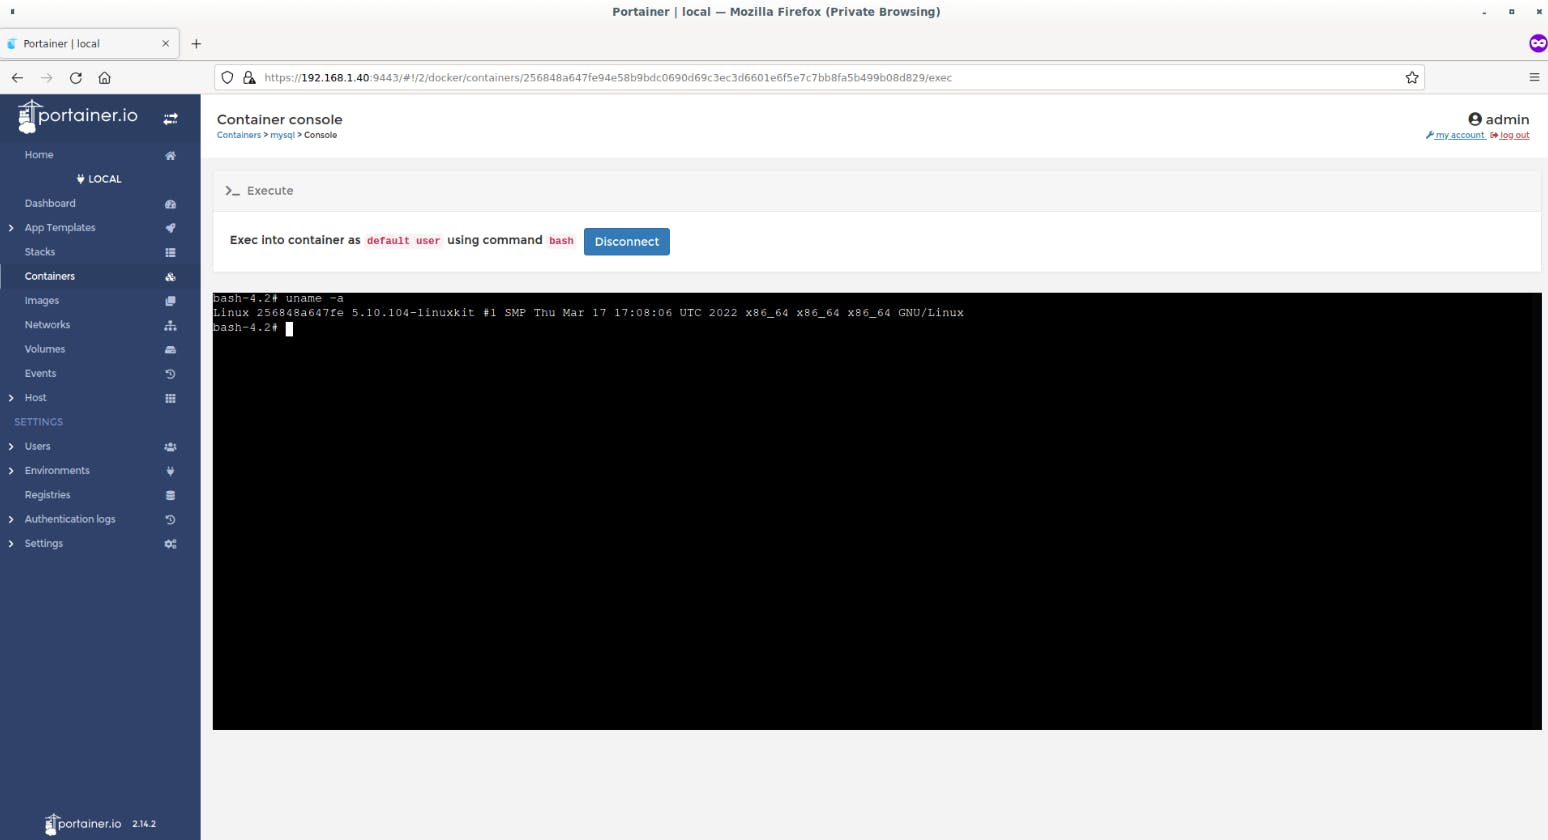
Now you will be connected to the Container's console.
View Container Details
To view the complete overview of any container, just click on the name of the container from the Containers list.
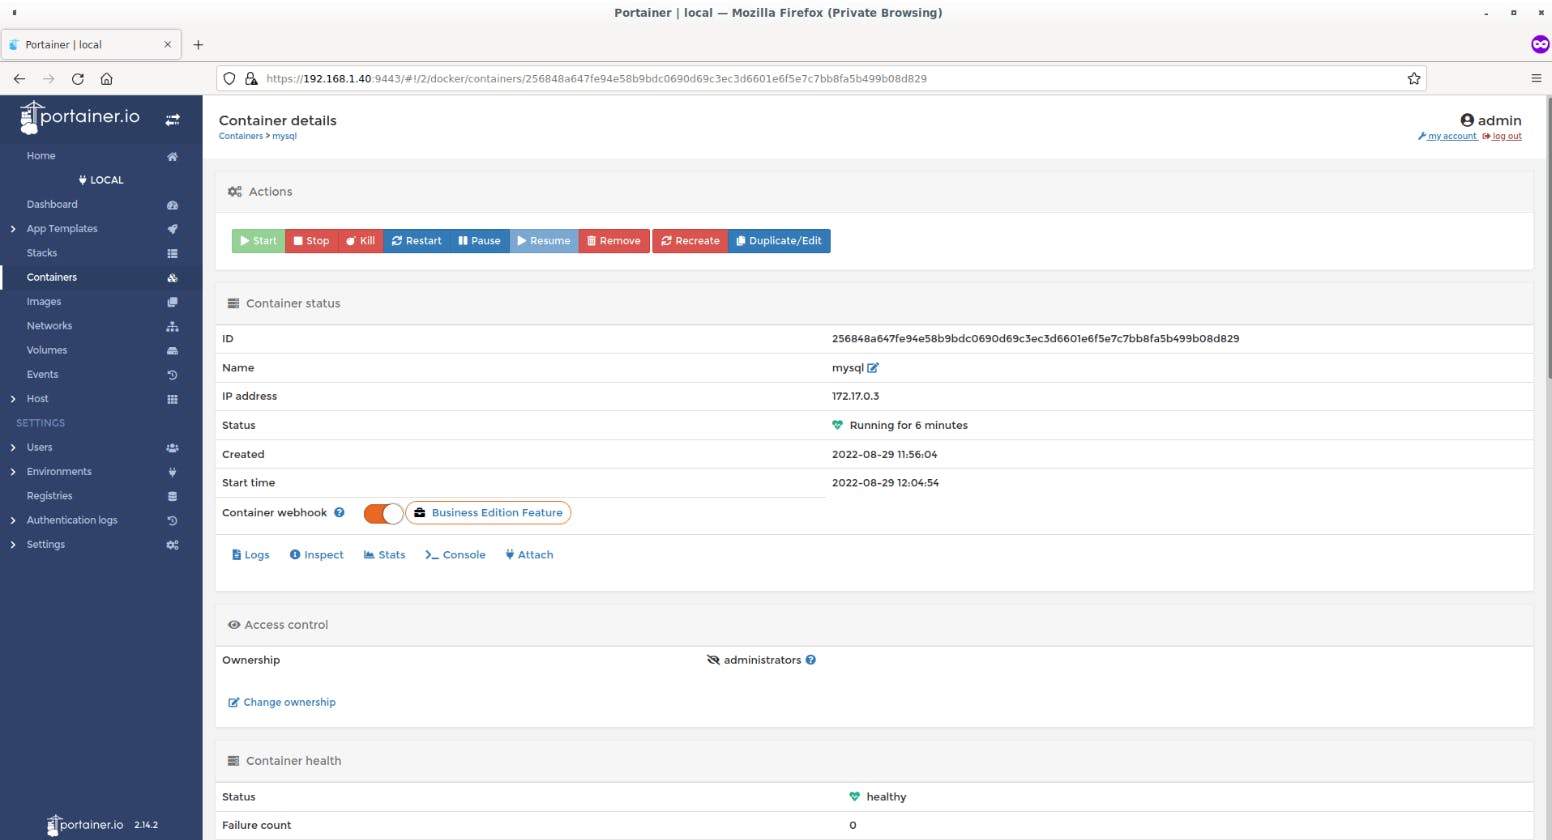
As you see in the above output, the Containers details section is further divided into the following sub-sections:
- Actions - This section containers buttons to control the container, such as Start, Stop, Kill, Restart, Pause, Resume, Remove, Recreate, Duplicate/Edit.
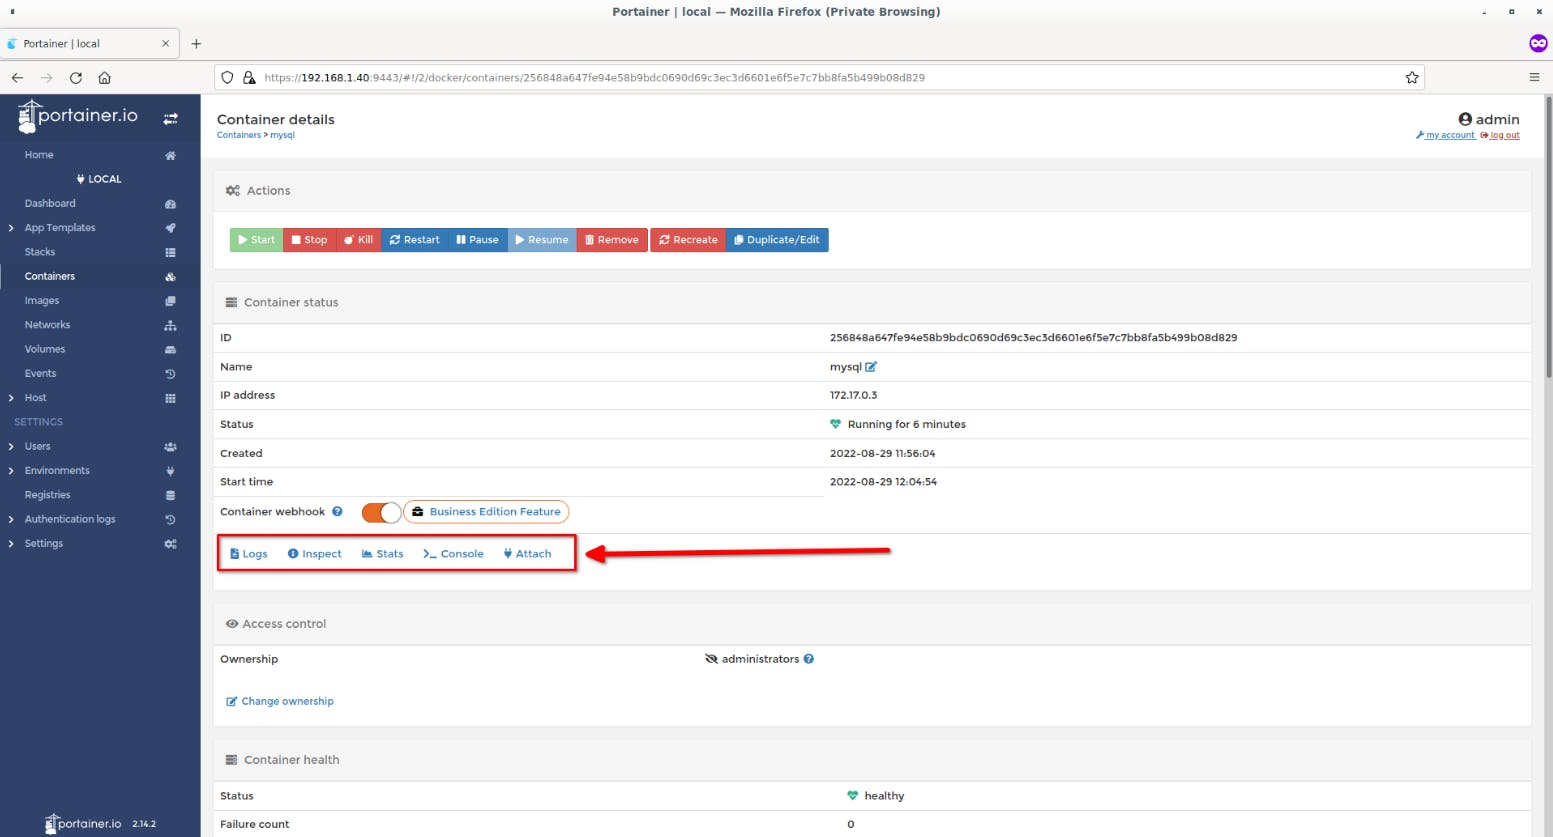
- Container status - In this section, you will container details such as the name, IP address, status of the container, when the container is created, container start time and a few more details. Under the Container status button, you will see the following controls:
- Logs - Display Container logs.
- Inspect - Inspect container image.
- Stats - View Container statistics.
- Console - Access Container console.
- Attach - Attach To Container console. Access control - View and change ownership.
- Container health - In this section, you will see the container health status, failure count and mysqld service status.
- Create image - This section allows you to create an image from this container. This allows you to backup important data or save helpful configurations. You'll be able to spin up another container based on this image afterward.
- Container details - In this section, you can view the docker image used to create this container, port configuration details, and environment details etc.
- Volumes - See the list of attached volumes to the container.
- Networks - View network configuration details.
Please note that you can do all aforementioned management actions (i.e. View Stats/Logs, Inspect, Access Console etc.) from the "Container Details" section too.
Docker Images
In this section, you can view the list of downloaded docker images.
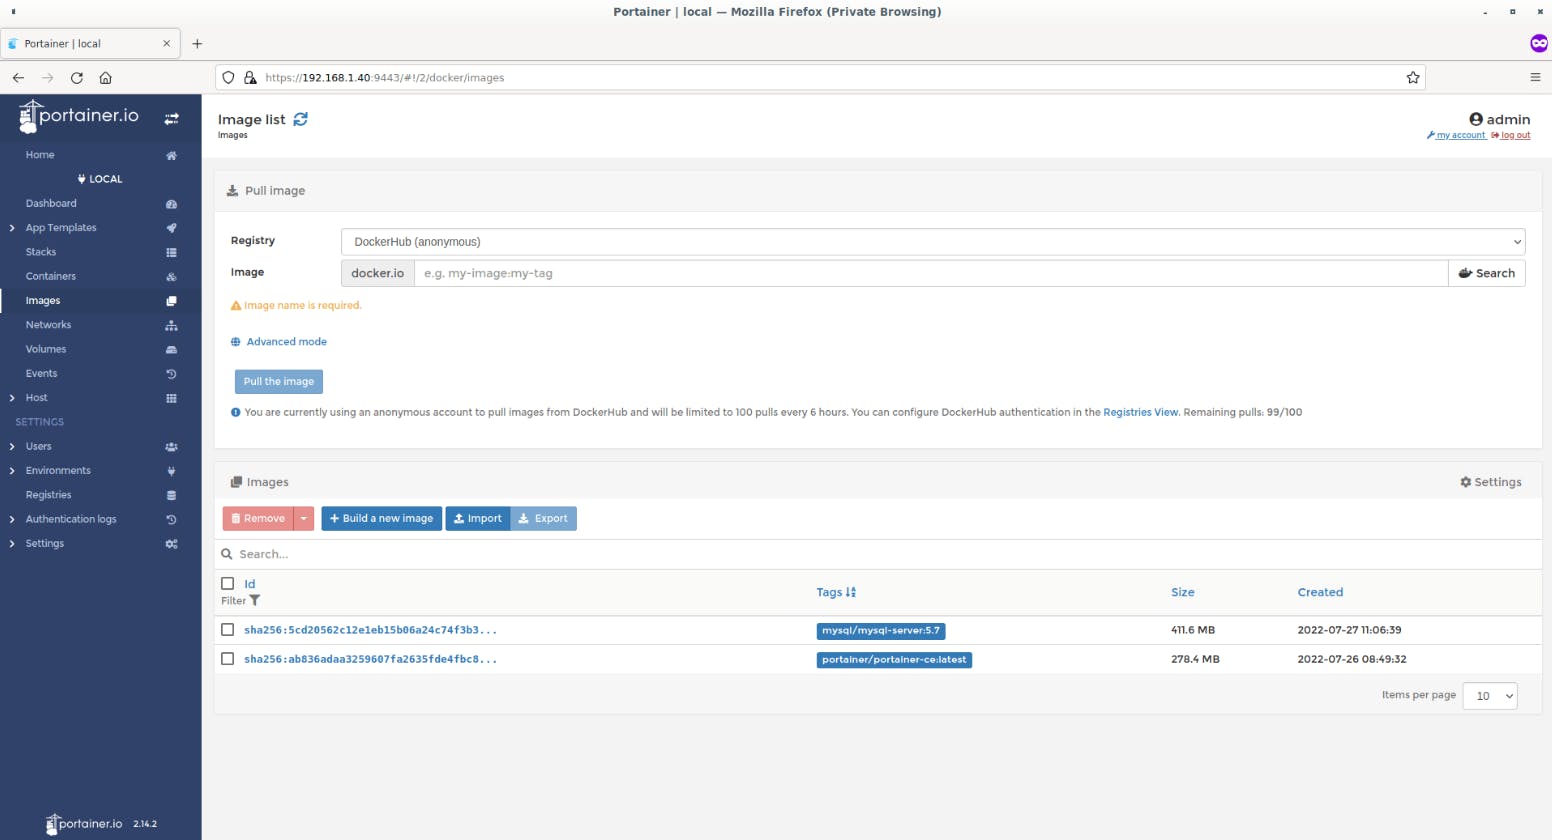
In this section, you can build new image, import, export and delete Docker images. To remove any image, just select it and click Remove.
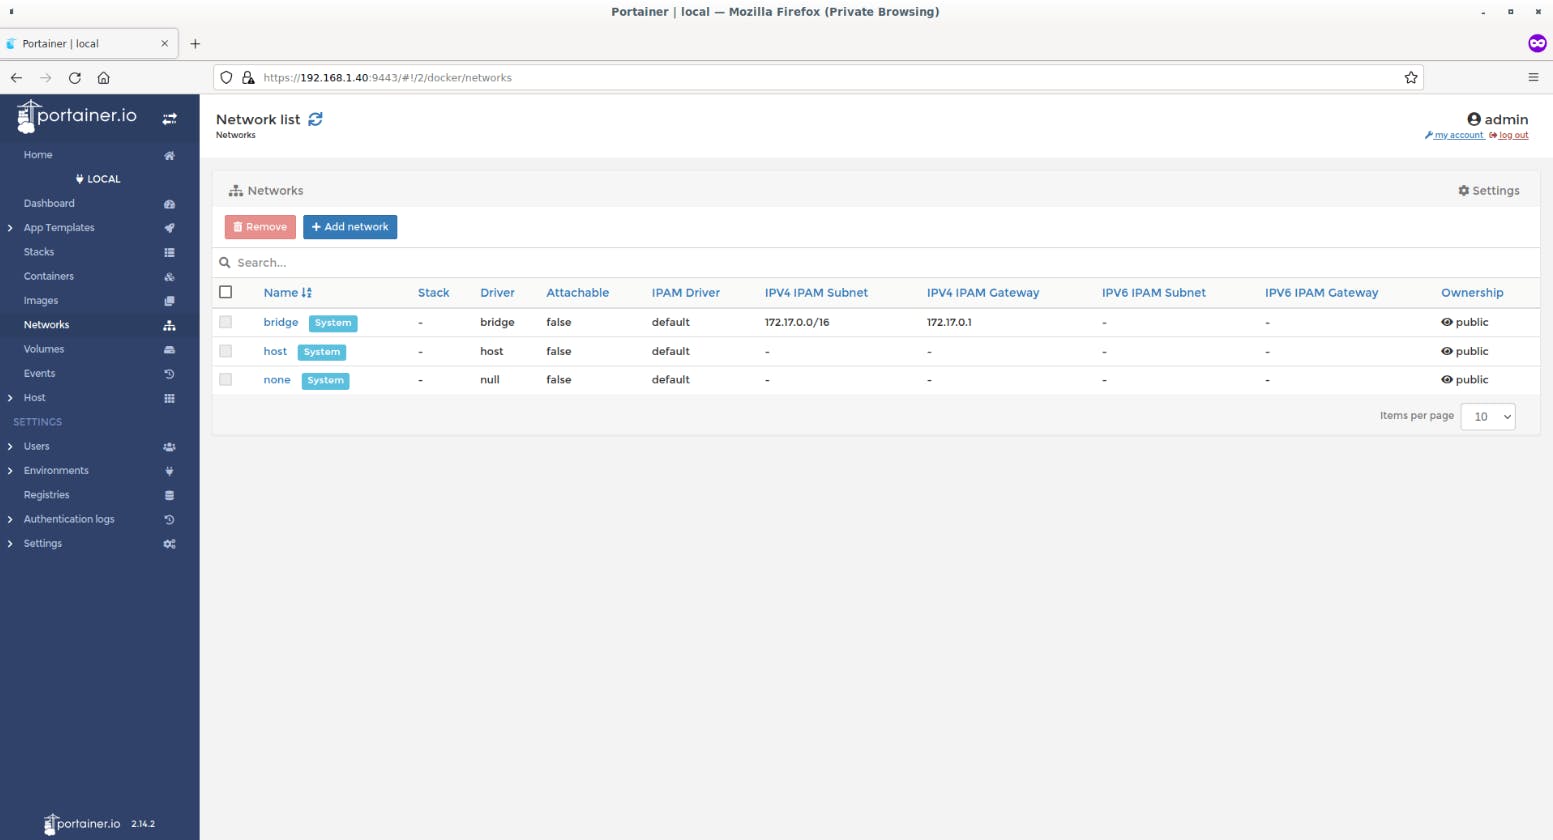
Networks
Networks section allows you to add a new network, change the network type, assign/change IP address, remove existing networks.
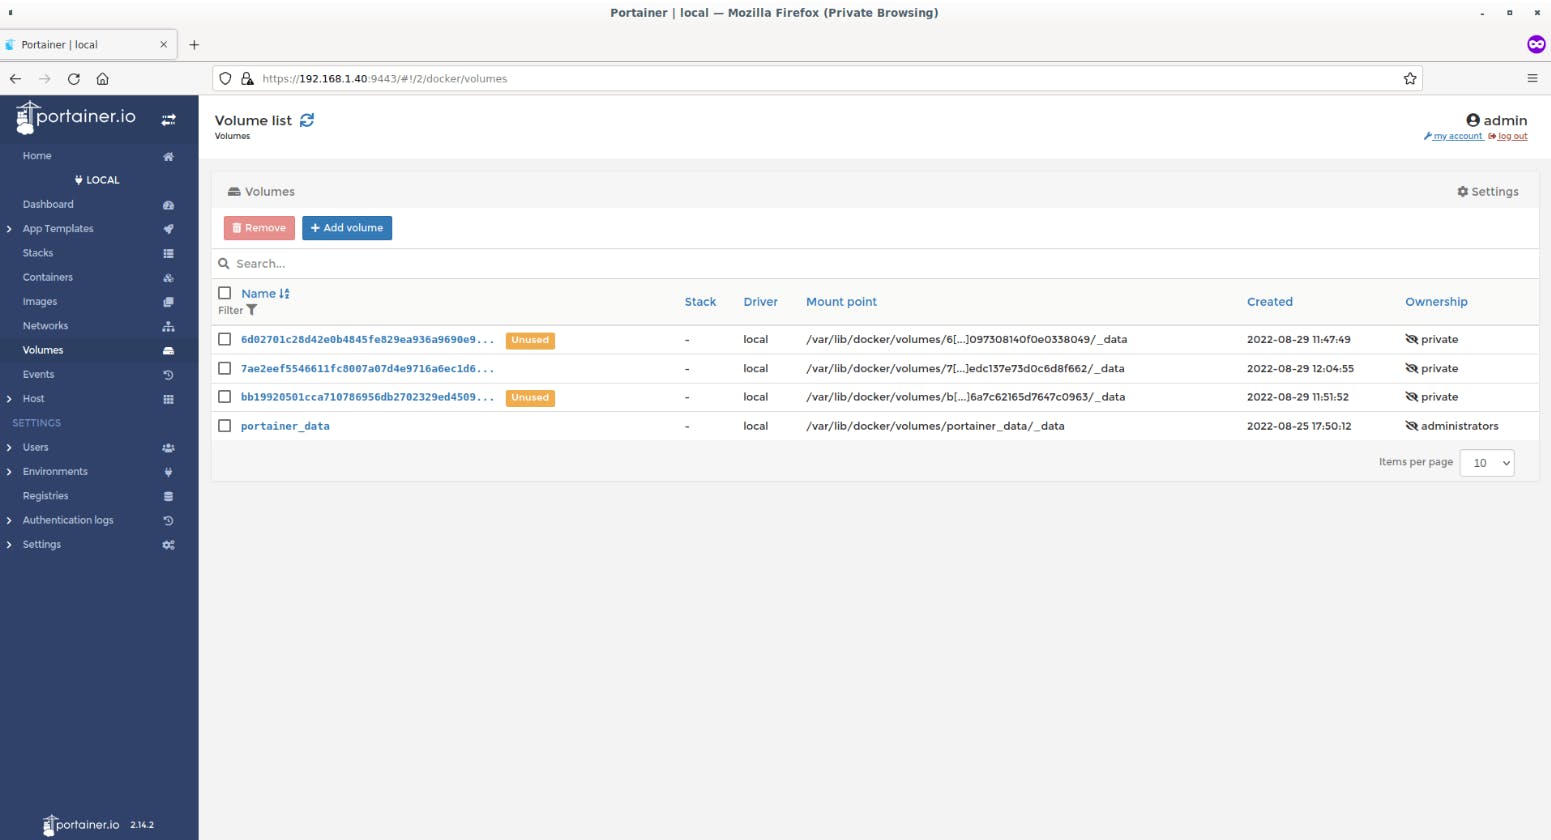
Volumes
Here, you can view existing docker volumes, create new one, delete them if you no longer need them.
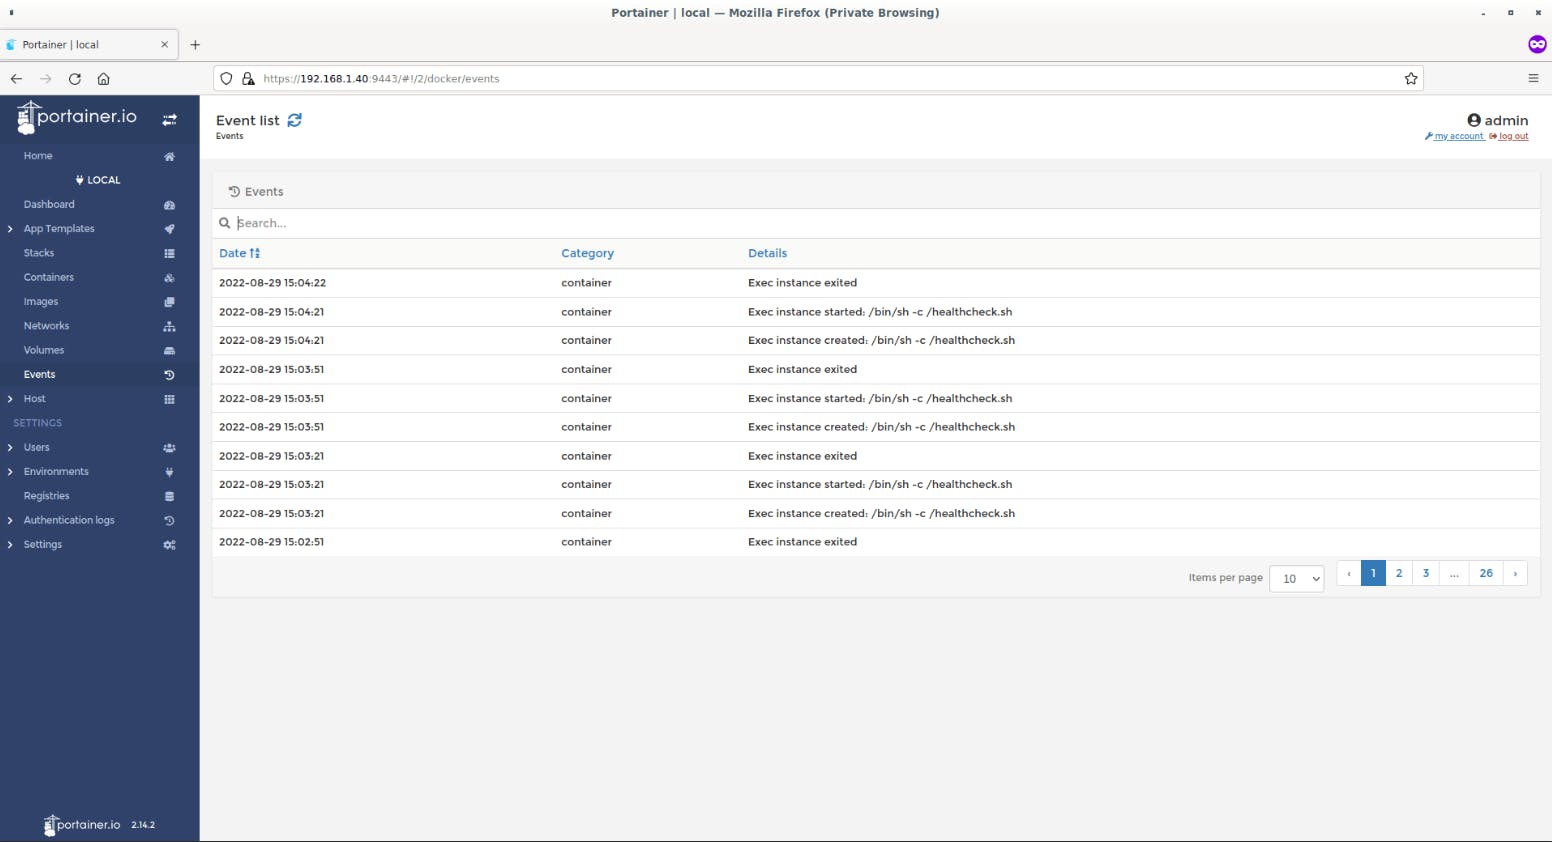
Events
In this section, we can view what we have done so far, such as creating a new instance, network, volume etc.
Host Overview
This section displays the Docker engine version, Host OS name, type, architecture, cpu, memory, network details etc.
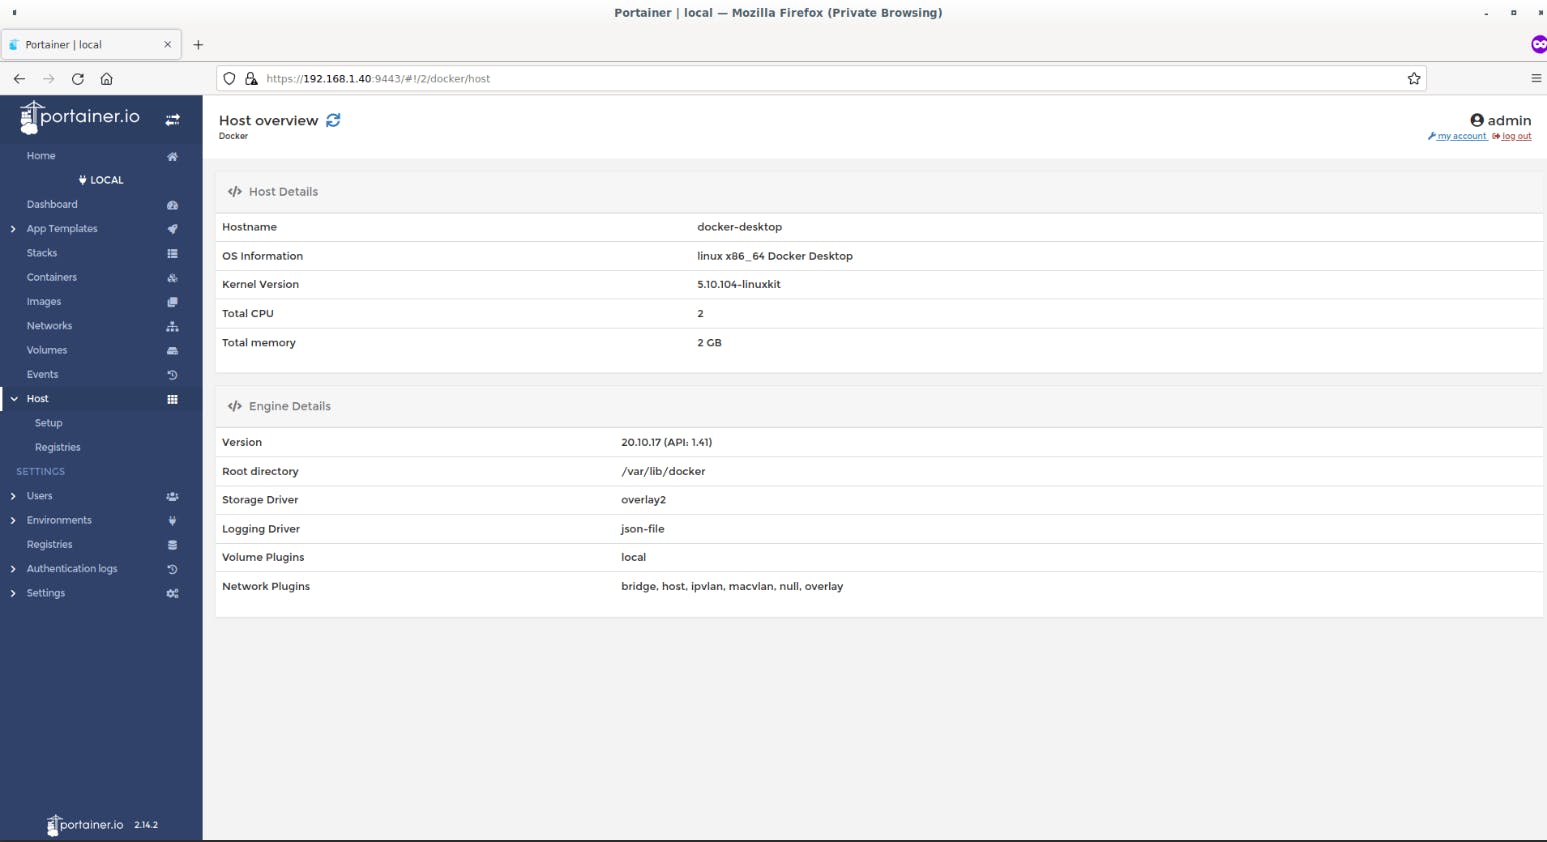
Under this section, you can also configure Docker features and setup registries (i.e. Docker hub, Quay, Azure, Gitlab etc.).
Users
The users section allows us to add new users, add users to teams, view list of existing users and delete the users.

You can also create a team(e.g. development) in which you can add users in this team and assign different roles to the users. The roles feature is available only for Portainer Business edition.
Environments
In this section, you can add new environment, view existing environments.
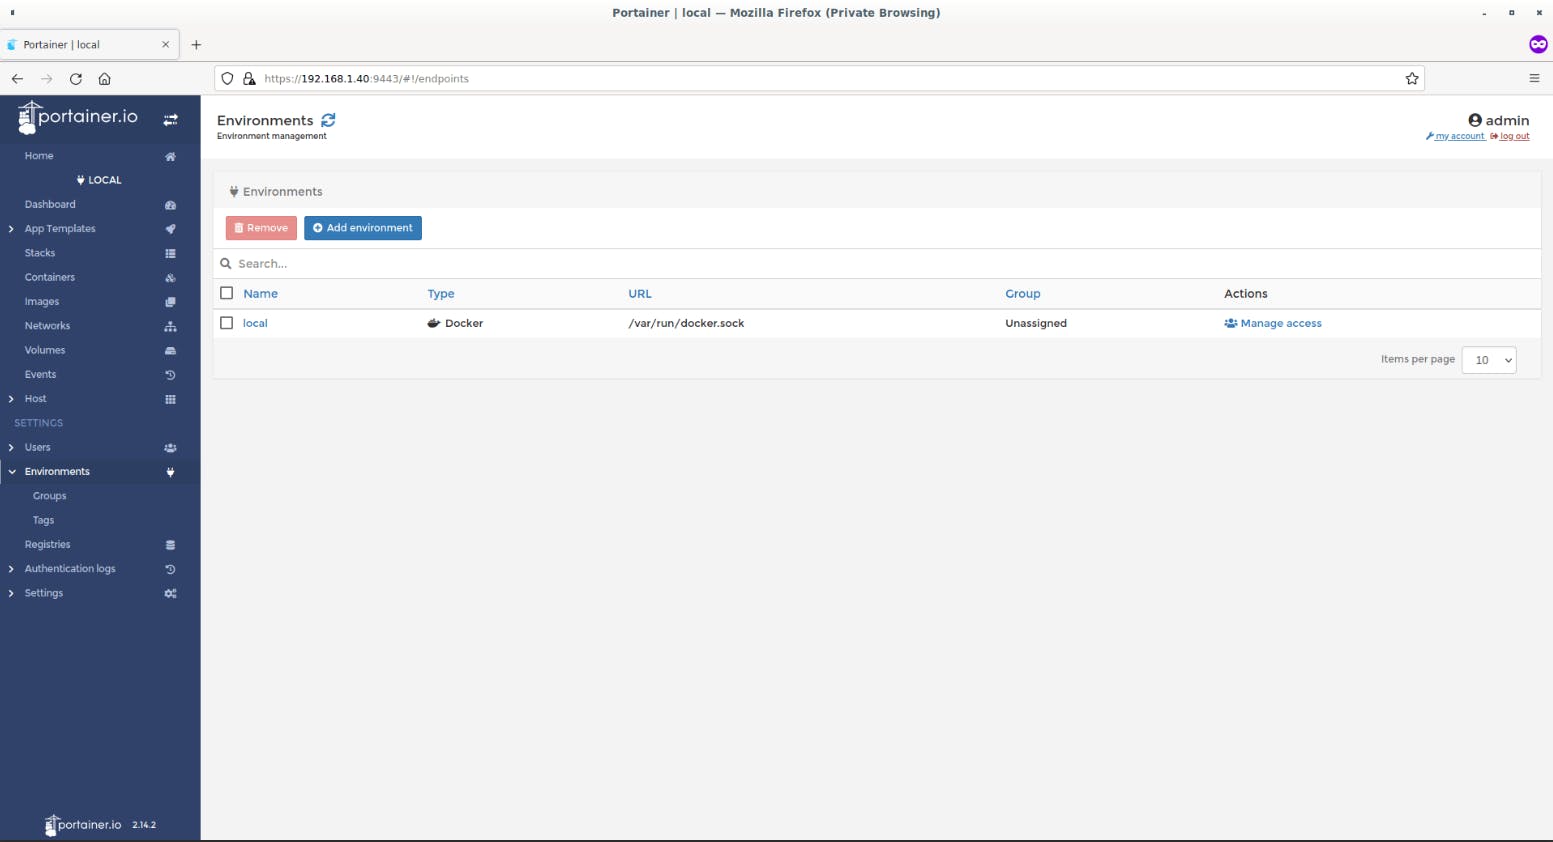
In Portainer CE, you can add Docker, Kubernetes and ACI environments. In business edition, you can add two more environments called Nomad and KaaS.
Authentication Logs
The Authentication logs section shows you to user activity details. Portainer user authentication activity logs have a maximum retention of 7 days. This is actually business edition feature. If you're using community edition, you can't use this feature.
Settings
This section is dedicated for Portainer settings. In this section, you can configure Portainer settings such as,
- define the snapshot level for containers,
- use custom logo for Portainer dashboard,
- specify the URL to your own template definitions file and HELM repository,
- configure SSL certificate,
- backup Portainer configuration etc.
Conclusion
In this detailed guide, we discussed what is Portainer, how to install Portainer, and how to use Portainer to create and manage Docker containers in Linux.
We also learned a brief overview about each section in the Portainer web dashboard. Using Portainer, you can do complete docker management either from the local system itself or a remote system.