
Git and GitHub 101
Getting Started with Git and GitHub: A Complete Tutorial for Beginner


Git as a Version Control System
Git is an open-source version control system commonly used by developers around the world. The version control system helps developers to contribute to the open-source projects and check the version of codes. The git is developed by Linus Torvald, the Linux founder as a tool to help Linux developers develop and maintain the codes. So, git is the second project of Linus Torvald to support the main project, Linux.
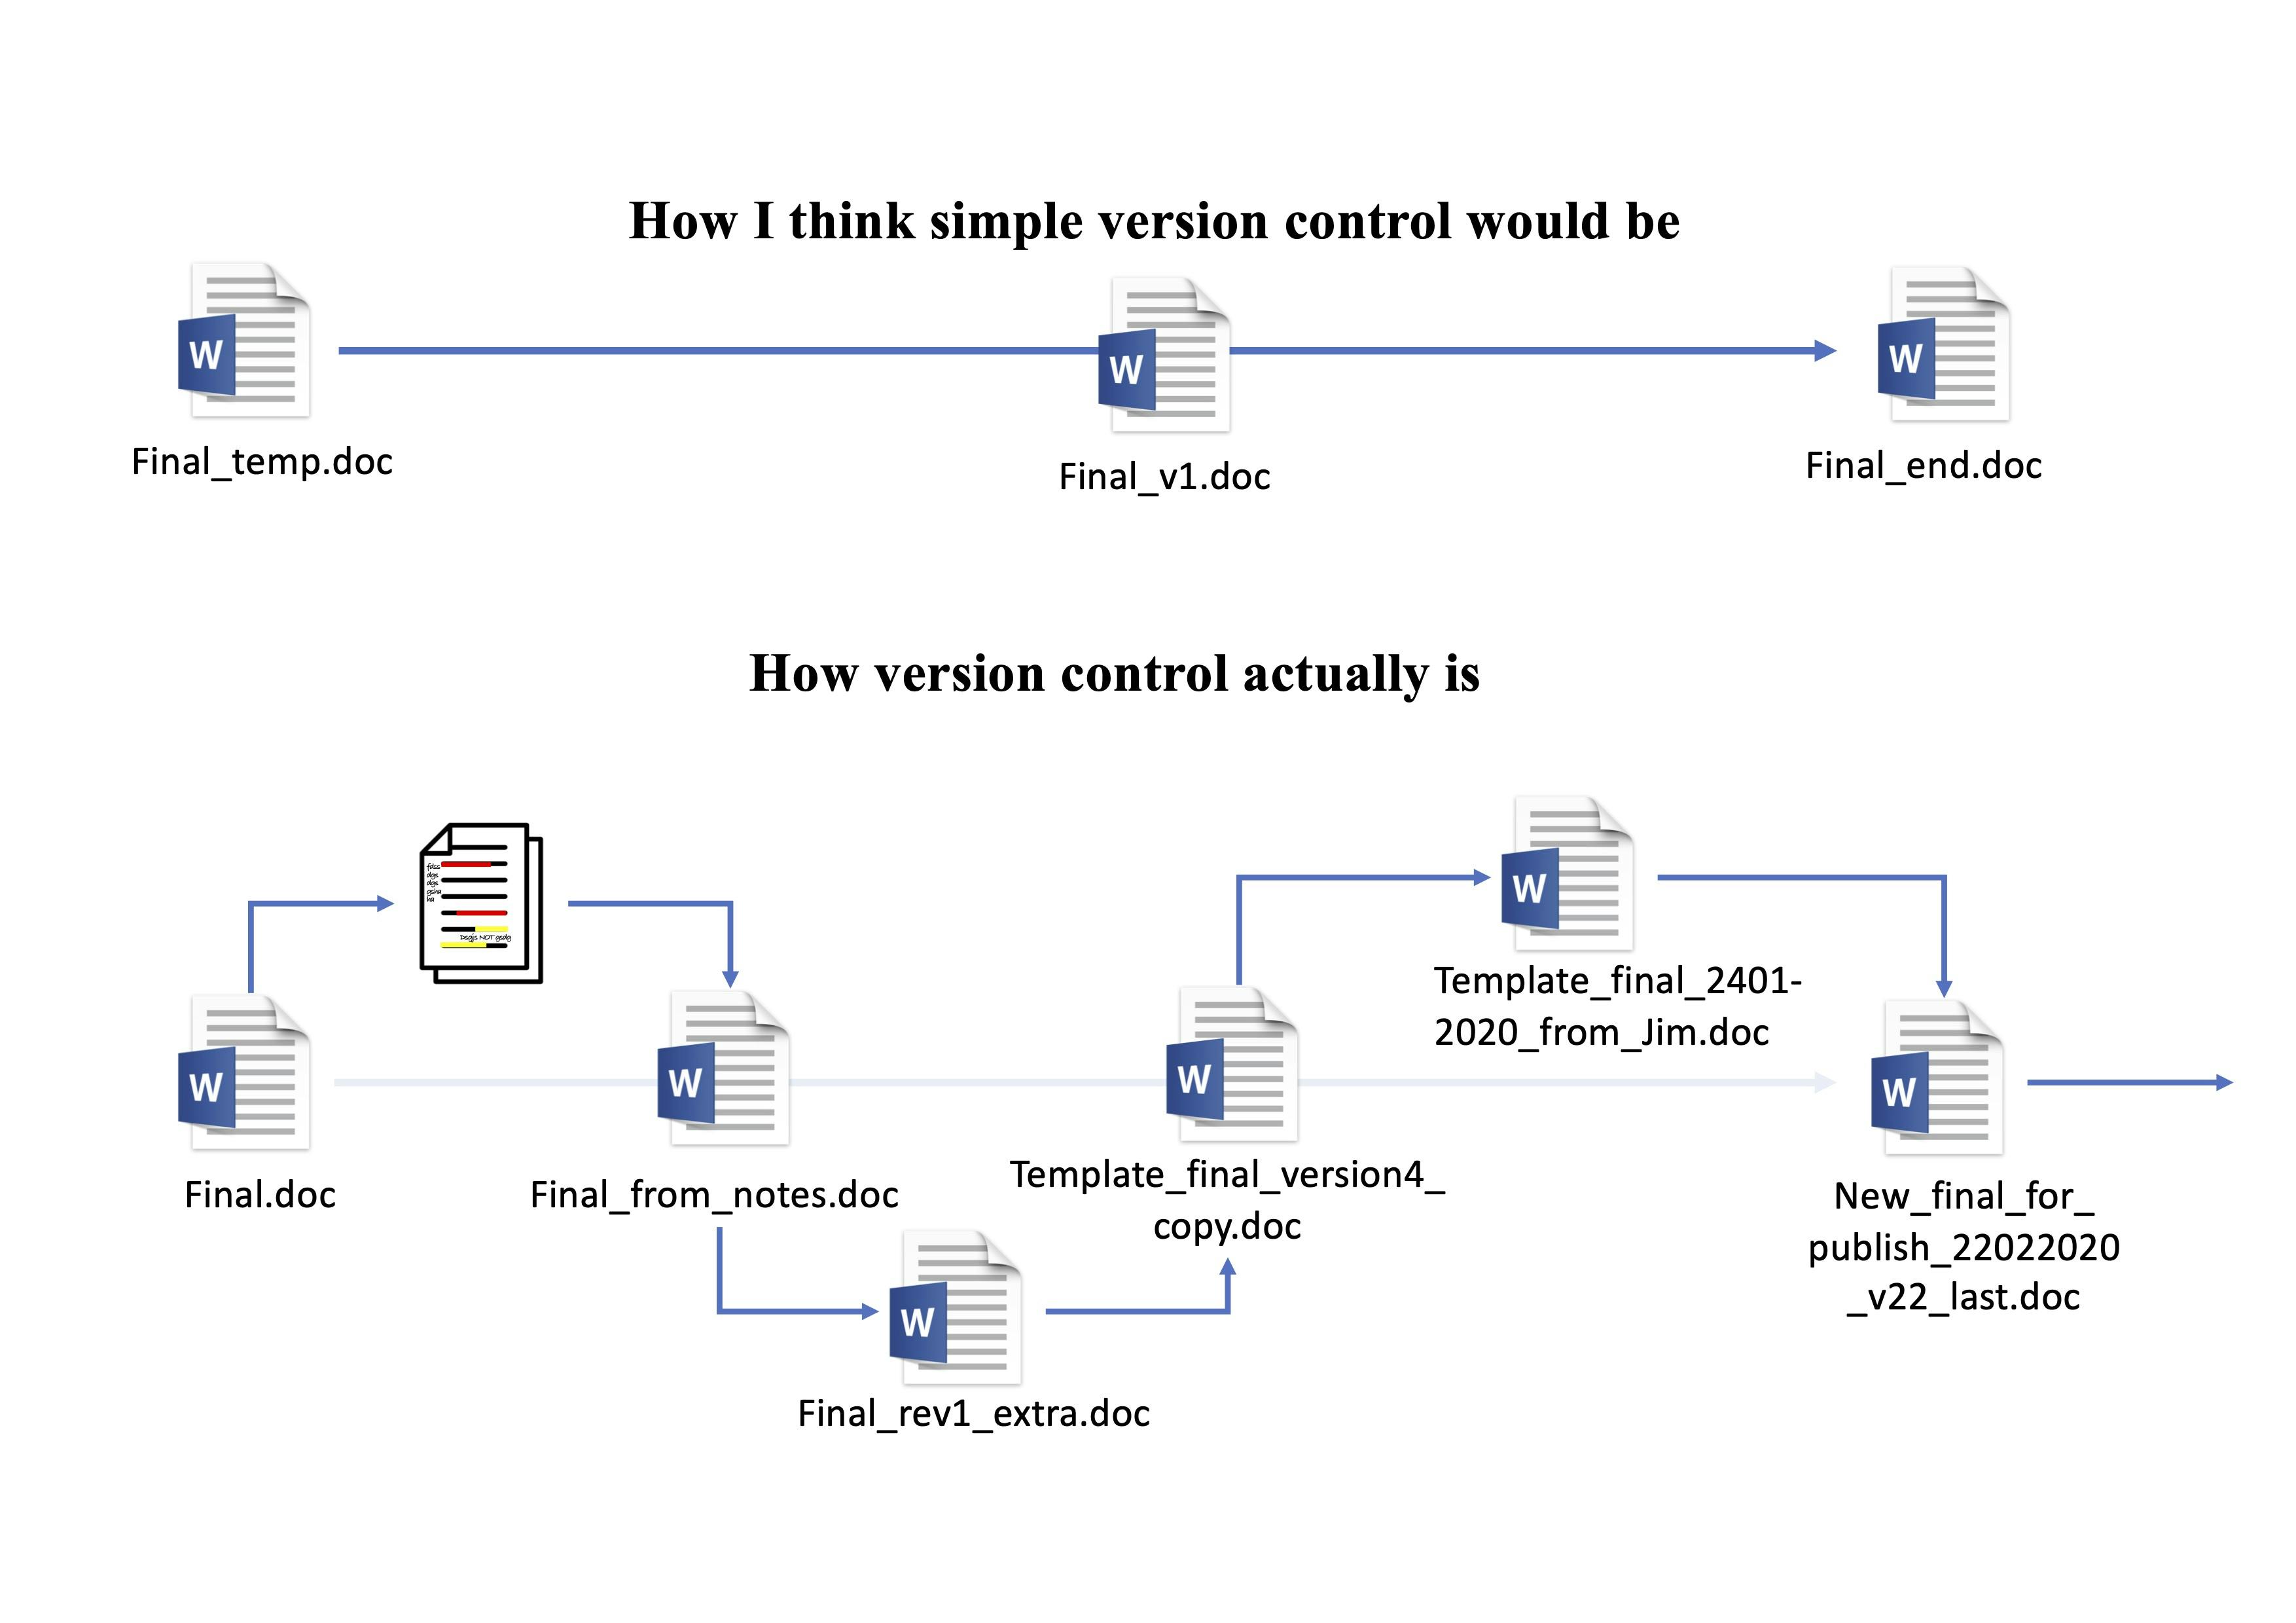
The above picture clearly explains to us the functionality of git as a versioning tool. It lets us work with a single file instead of many files with their own version. Working with basic versioning (many files) tends to be untraceable and unstructured. We can not easily track the file revision in the shortest period of time. While using git, any revision or changes will be recorded on the git system and as users, we can move back to a certain version of files as we want to. From git logs, we can track the revision in our works, from the beginning.
Tech companies and open-source projects are widely using version control systems to manage their project. Thus, it is important to learn the basic git commands for our future work and career in a tech company. Please follow along with commands that used for git operations.
Difference between Git and GitHub
Git is a version control tool (software) to track the changes in the source code.
GitHub is a web-based cloud service to host your source code(Git repositories). It is a centralized system.
Git doesn’t require GitHub but GitHub requires Git.
How to Install Git
There are two ways of installing Git.
1. Install Git for using WSL (Windows Subsystem for Linux)
Install Ubuntu – youtube.com/watch?v=X-DHaQLrBi8
Install Git in Ubuntu – digitalocean.com/community/tutorials/how-to..
2. Install Git software for windows – git-scm.com/download/win
Go ahead with whichever method is comfortable for you. Continue further once you are done with the installation.
Before deep-diving into Git operations and commands, create an account for yourself on GitHub if you don’t have it already.
Create repositories
Create a remote central repository on GitHub.
docs.github.com/en/get-started/quickstart/c..
create a local repository using git (I am using Git software on Windows 10)
Open your file explorer, navigate to the working directory, right-click and select “Git Bash Here”. This opens the Git terminal. To create a new local repository use the command git init and it creates a folder .git.
git init to create a new Git repository
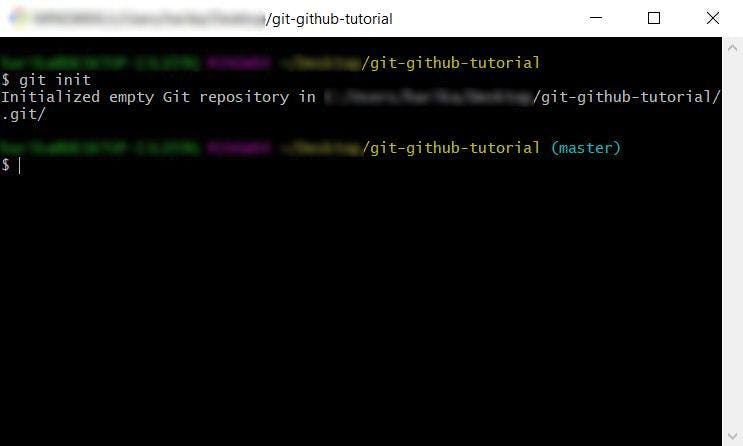
(master) is the default branch of the local repository.
Next, we need to sync the local and the central repositories.
git remote add to add a new remote repository.
To get the URL of the central repo, open your repository in GitHub and copy the link.
Execute the below command,
$ git remote add origin "github.com/names/git-github-tutorial.git"
Generally, Origin is the shorthand name of the remote repository that we are cloning.
After adding, we need to pull the files from the remote repo.
git pull to download all the content from the remote repo
$ git pull origin main
(main is the branch in our central/remote repository. Kindly check the branch name before pull request)
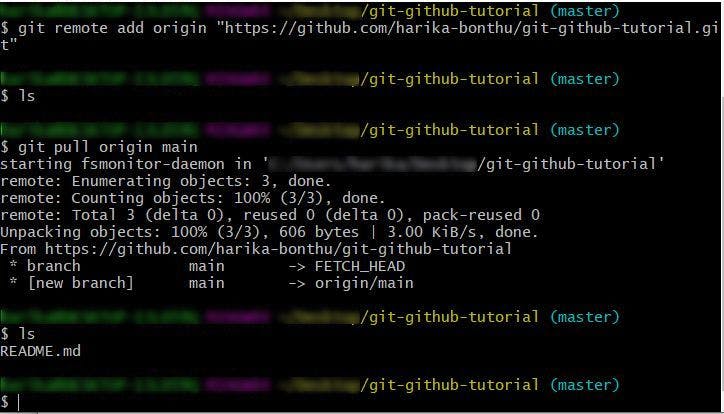
With just adding the origin, we do not have any files. After pulling from the main branch, we now have a README.md file in the local repository.
Now, if you again try to pull, it says “Already up to date.”
$ git pull origin main
From github.com/names/git-github-tutorial
- branch main -> FETCH_HEAD
Already up to date.
Next, if you want to check if any files are modified or to be committed, use the below command.
git status to check the status of the working directory and the staging area.
Working directory – It is the place where we make changes to the existing files or create new files.
Staging area – It is the place where the files are ready to be committed.
$ git status
On branch master
nothing to commit, working tree clean
Since the last pull, we haven’t made any changes in the working directory. So it says “nothing to commit, working tree clean)
Now the question is, how do we add files to the staging area.
git add to add files to the index or the staging area.
To demonstrate it with an example, I am modifying the README.md file and creating two more text files “file1.txt”, “file2.txt”
If you wish to use the command line for creating or modifying files, please refer to the video: youtube.com/watch?v=UeF4ZhnPzZQ
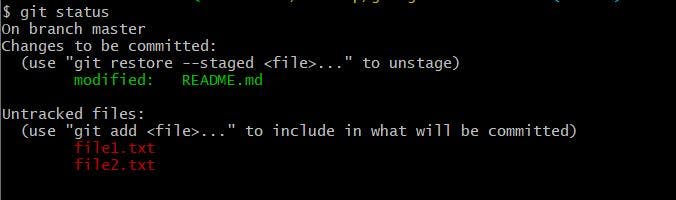
After making changes in the working directory, once again check the status using the command git status.
$ git status
On branch master
Changes not staged for commit:
(use “git add …” to update what will be committed)
(use “git restore …” to discard changes in working directory)
modified: README.md
Untracked files:
(use “git add …” to include in what will be committed)
file1.txt
file2.txt
no changes added to commit (use “git add” and/or “git commit -a”)
It shows that the files file1.txt, file2.txt are untracked and README.md is modified.
Next, we will see how to add the README.md file to the staging area.
$ git add README.md
Below is the status after adding it to the staging area.
The next step is to commit these changes to the local repository.
git commit to save the changes to the local repository.
$ git commit -m "Initial commit"

-m in the above command stands for the message. The message lets other developers know what changes have been made.
Don’t forget we still have two files in the working directory that are to be committed.
Now, I am going to modify file1.txt, file2.txt files using the “nano” command.
To add multiple files to the staging area, we can simply use -A flag in the git add command.
$ git add -A
Then check the status and commit them.
$ git status
$ git commit -m "Committed txt files"
Now, what if you want to undo staging? Let’s see how it is done.
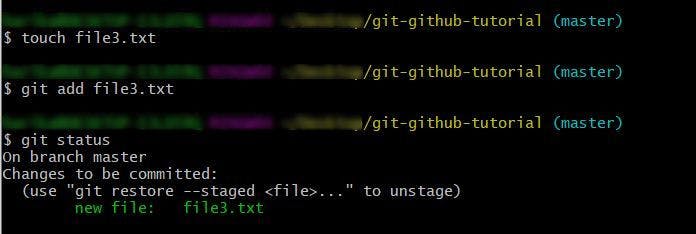
For that, I am creating another file named “file3.txt” and add it to the staging area and check the status.
$ touch file3.txt
$ git add file3.txt
$ git status
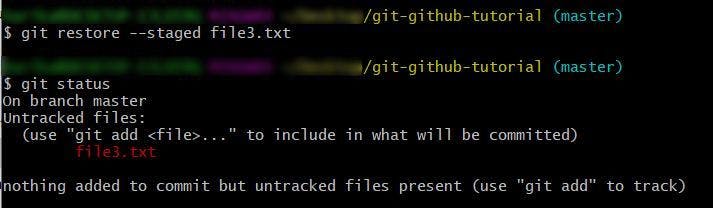
To undo it, use the below command.
git restore --staged file3.txt
To see all the commits that are made till now, check the log.
git log to see all the commits
$ git log
Once you get familiar with the concepts that are discussed now, we will move to the topic branches.
A branch in Git is an independent line of work(a pointer to a specific commit). It allows users to create a branch from the original code (master branch) and isolate their work.
git branch to create a new branch
$ git branch branch1
To see all the branches used git branch -a
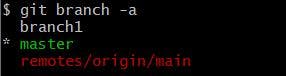
master is highlighted as we are currently working in the master branch. To switch to another branch we need to checkout.
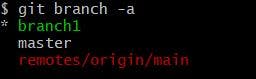
git checkout to switch to another branch
$ git checkout branch1
 $ git branch -a
 branch1 will have all the files of the master branch as it is originated from the master.
$ ls
README.md file1.txt file2.txt file3.txt
In branch1, I would like to make changes to file1.txt and create another text file names file4.txt
Now add these files to the staging area and commit. If you now check the master branch, these changes are not yet made there.
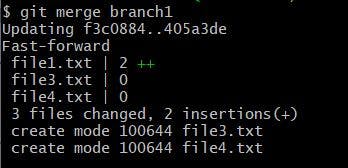
To make these changes to the master branch, we need to merge branch1 with master.
$ git checkout master
$ git merge branch1
To revert to a particular commit, we can use the first 8 digits of the hexadecimal code of a respective commit
git checkout 8digitcode file1.txt
git checkout f3c0884b file1.txt
Updated 1 path from 32610ca
Once we are done working, we need to push all these code files to the central/remote repository.
git push to send all files to the remote repository.
$ git push origin main

If you encounter such a problem, use the below command.
$ git push origin HEAD:main
Now go to your GitHub and TADA your files are hosted on the central repository.