GitOps in Kubernetes with Argo CD

Introduction
When some developers think of Infrastructure as Code (IaC), what typically comes to mind is using tools like Terraform to provision virtual machines and other cloud infrastructure.
In this article, however, we will be taking a look at a Continuous Delivery strategy that allows us to not only define our infrastructure as code, but our application configuration as well using ArgoCD. Ready? Let’s dive into it!
What is GitOps?
GitOps is a Continuous Delivery strategy where our infrastructure and application configuration are defined as code and stored centrally in a version control system like Git. GitOps uses Git as a single source of truth. This means that it uses what is defined in the Git repository to configure your infrastructure and applications.
When deploying applications to Kubernetes with traditional DevOps CI/CD pipelines, an external tool like Jenkins is usually responsible for applying the Kubernetes manifests into the cluster. However, in a GitOps workflow, an agent is installed in the cluster and continually checks the Git repository for changes. When any change is detected, it attempts to update the cluster to reflect these changes. This way, the entire system can be defined declaratively and access to the cluster can be controlled.
Some advantages of using GitOps include:
- Faster and safer deployments
- Ease of performing rollbacks
- Better traceability
- It makes it easy to eliminate configuration drifts
Some popular GitOps tools include: ArgoCD, FluxCD and JenkinsX. In this article, we will focus on ArgoCD: an open source tool GitOps continuous delivery tool for Kubernetes, that’s part of the Cloud Native Computing Foundation.
ArgoCD basics
In this section, we will take a deep dive into ArgoCD, what it is, how to install, and how to deploy a basic application into it.
ArgoCD allows us to use Git as a single source of truth. This means that we define all our application configuration as code in a Git repository and ArgoCD updates our cluster to match what is defined in the repository.
In addition to watching the Git repository, it also watches the Kubernetes cluster for changes and syncs the state of the cluster back to what is defined in the Git repository if a change is detected in the cluster. Interestingly, a single ArgoCD installation can be used to manage multiple clusters as well.
Let’s install ArgoCD and take a look at it in action.
Step 1 — Installing Argo CD on Your Cluster
In order to install Argo CD, you should first have a valid Kubernetes configuration set up with kubectl, from which you can ping your worker nodes. You can test this by running kubectl get nodes:

This command should return a list of nodes with the Ready status:
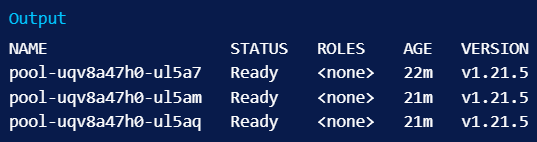
If kubectl does not return a set of nodes with the Ready status, you should review your cluster configuration and the Kubernetes documentation.
Next, create the argocd namespace in your cluster, which will contain Argo CD and its associated services:

After that, you can run the Argo CD install script provided by the project maintainers.
kubectl apply -n argocd -f https://raw.githubusercontent.com/argoproj/argo-cd/stable/manifests/install.yaml
Once the installation completes successfully, you can use the watch command to check the status of your Kubernetes pods:

By default, there should be five pods that eventually receive the Running status as part of a stock Argo CD installation.
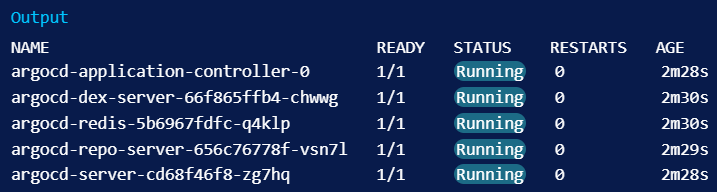
You can press Ctrl+C to exit the watch interface. You now have Argo CD running in your Kubernetes cluster! However, because of the way Kubernetes creates abstractions around your network interfaces, you won’t be able to access it directly without forwarding ports from inside your cluster. You’ll learn how to handle that in the next step.
Step 2 — Forwarding Ports to Access Argo CD
Because Kubernetes deploys services to arbitrary network addresses inside your cluster, you’ll need to forward the relevant ports in order to access them from your local machine. Argo CD sets up a service named argocd-server on port 443 internally. Because port 443 is the default HTTPS port, and you may be running some other HTTP/HTTPS services, it’s common practice to forward those to arbitrarily chosen other ports, like 8080, like so:

Port forwarding will block the terminal it’s running in as long as it’s active, so you’ll probably want to run this in a new terminal window while you continue to work. You can press Ctrl+C to gracefully quit a blocking process such as this one when you want to stop forwarding the port.
In the meantime, you should be able to access Argo CD in a web browser by navigating to localhost:8080. However, you’ll be prompted for a login password which you’ll need to use the command line to retrieve in the next step. You’ll probably need to click through a security warning because Argo CD has not yet been configured with a valid SSL certificate.
Step 3 — Working with Argo CD from the Command Line
For the next steps, you’ll want to have the argocd command installed locally for interfacing with and changing settings in your Argo CD instance. Argo CD’s official documentation recommends that you install it via the Homebrew package manager. Homebrew is very popular for managing command line tools on MacOS, and has more recently been ported to Linux to facilitate maintaining tools like this one.
If you don’t already have Homebrew installed, you can retrieve and install it with a one-line command:
/bin/bash -c "$(curl -fsSL https://raw.githubusercontent.com/Homebrew/install/HEAD/install.sh)"
You may be prompted for your password during the installation process. Afterward, you should have the brew command available in your terminal. You can use it to install Argo CD:

This in turn provides the argocd command. Before using it, you’ll want to use kubectl again to retrieve the admin password which was automatically generated during your installation, so that you can use it to log in. You’ll pass it a path to a particular JSON file that’s stored using Kubernetes secrets, and extract the relevant value:
kubectl -n argocd get secret argocd-initial-admin-secret -o jsonpath="{.data.password}" | base64 -d; echo
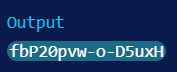
You can then log into your Argo CD dashboard by going back to localhost:8080 in a browser and logging in as the admin user with your own password:

Once everything is working, you can use the same credentials to log in to Argo CD via the command line, by running argocd login. This will be necessary for deploying from the command line later on:

You’ll receive the equivalent certificate warning again on the command line here, and should enter y to proceed when prompted. If desired, you can then change your password to something more secure or more memorable by running argocd account update-password. After that, you’ll have a fully working Argo CD configuration. In the final steps of this tutorial, you’ll learn how to use it to actually deploy some example applications.
Step 4 — Handling Multiple Clusters (Optional)
Before deploying an application, you should review where you actually want to deploy it. By default, Argo CD will deploy applications to the same cluster that Argo CD itself is running in, which is fine for a demo, but is probably not what you’ll want in production. In order to list all of the clusters known to your current machine, you can use kubectl config:


Assuming that you’ve installed Argo CD into test-deploy-cluster, and you wanted to use it to deploy applications onto test-target-cluster, you could register test-target-cluster with Argo CD by running argocd cluster add:

This will add the additional cluster’s login details to Argo CD, and enable Argo CD to deploy services on the cluster.
Step 5 — Deploying an Example Application (Optional)
Now that you have Argo CD running and you have an understanding of how to deploy applications to different Kubernetes clusters, it’s time to put it into practice. The Argo CD project maintains a repository of example applications that have been architected to showcase GitOps fundamentals. Many of these examples are ports of the same guestbook demo app to different kinds of Kubernetes manifests, such as Jsonnet. In this case, you’ll be deploying the helm-guestbook example, which uses a Helm chart, one of the most durable Kubernetes management solutions.
In order to do that, you’ll use the argocd app create command, providing the path to the Git repository, the specific helm-guestbook example, and passing your default destination and namespace:
$ argocd app create helm-guestbook --repo https://github.com/argoproj/argocd-example-apps.git --path helm-guestbook --dest-server https://kubernetes.default.svc --dest-namespace default
After “creating” the application inside of Argo CD, you can check its status with argocd app get:

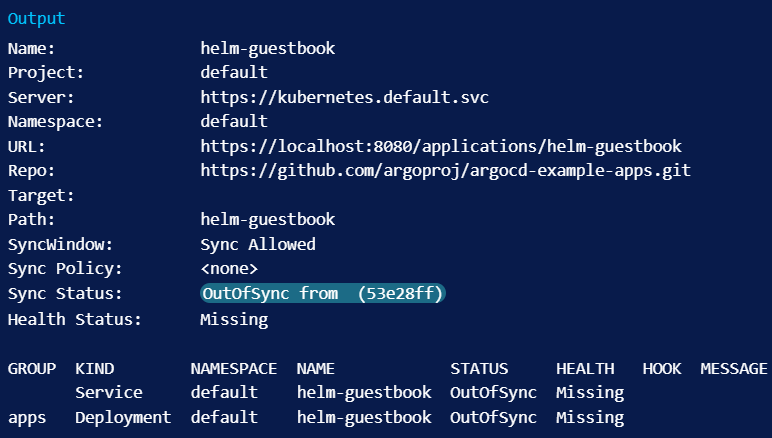
The OutOfSync application status is normal. You’ve retrieved the application’s helm chart from Github and created an entry for it in Argo CD, but you haven’t actually spun up any Kubernetes resources for it yet. In order to actually deploy the application you’ll run argocd app sync:

sync is synonymous with deployment here in keeping with the principles of GitOps – the goal when using Argo CD is for your application to always track 1:1 with its upstream configuration.
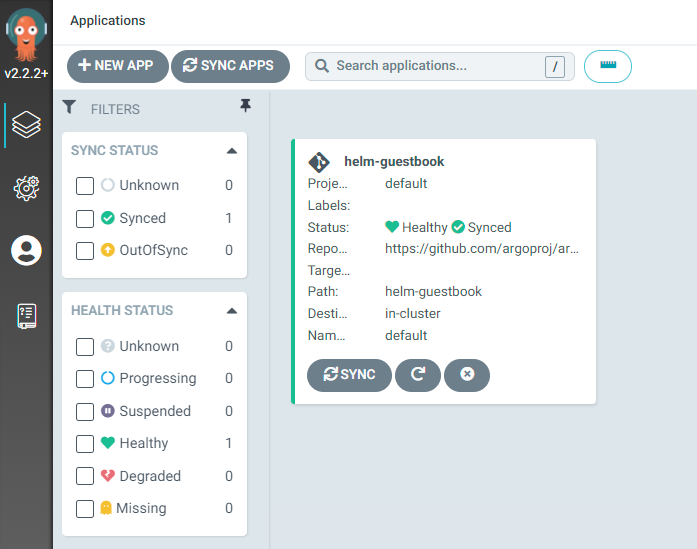
You have now successfully deployed an application using Argo CD! It is possible to accomplish the same thing from the Argo CD web interface, but it is usually quicker and more reproducible to deploy via the command line. However, it is very helpful to check on your Argo CD web dashboard after deployment in order to verify that your applications are running properly. You can see that by opening localhost:8080 in a browser:
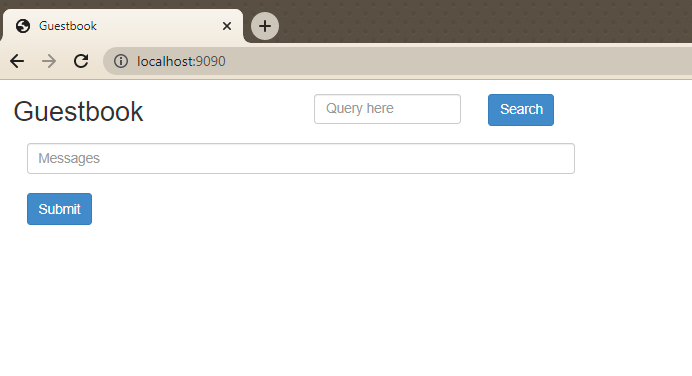
At this point, the last thing to do is to ensure you can access your new deployment in a browser. To do that, you’ll forward another port, the way you did for Argo CD itself. Internally, the helm-guestbook app runs on the regular HTTP port 80, and in order to avoid conflicting with anything that might be running on your own port 80 or on the port 8080 you’re using for Argo CD, you can forward it to port 9090:

As before, you’ll probably want to do this in another terminal, because it will block that terminal until you press Ctrl+C to stop forwarding the port. You can then open localhost:9090 in a browser window to see your example guestbook app:
Any further pushes to this Github repository will automatically be reflected in ArgoCD, which will resync your deployment while providing continuous availability.
Conclusion
You’ve now seen the fundamentals of installing and deploying applications using Argo CD. Because Kubernetes requires so many layers of abstraction, it’s important to ensure that your deployments are as maintainable as possible, and the GitOps philosophy is a good solution.


